
Full LibGDX Game Tutorial – Entities using Ashley the ECS
Welcome to part 10 of our Full LibGDX Game Tutorial. This part will focus on improving our current system by using Ashley an Entity Component System. If you haven’t seen the earlier parts of this tutorial I advise you to start at Full LibGDX Game Tutorial – Project setup as this tutorial continues from these earlier parts. For those of you who have come from part 9, you can continue on.
We currently have a system in place that allows us to start loading our assets, which then goes to a menu and from there we can start the game. The game so far allows us to control a player character to some extent. This current system is hard coded and makes it difficult to update with new features and new mechanics. This is where the Entity Component System (ECS) comes in handy. The ECS will allow us to break our game model down into sections that can be easier to maintain and modify. Our model will be broken down into Engine, Systems, Entities and Components. How are we going to do this? you ask. Well, we’re going to use Ashley the ECS designed to run with Libgdx. The Ashley wiki contains more information on the ECS than this guide will go into available here.
Ashley
As mentioned earlier Ashley breaks the model down into Engine, System, Entities and Components. The Engine is the controller that will run they systems we define. It will also control the creating and destroying of systems, entities and components. In games we have different sections that require logic such as rendering images, physics, collisions etc, this is where the Systems comes in. We will use a system for each area of logic. So we will have a Rendering system which solely focuses on rendering textures. Next, we have components. Components are simple classes which store data such as an image or the position of our player and finally, we have our Entities. The Entities will be a collection of components used to define an in-game object.
For example, we have a player entity which has 2 components: ImageComponent(stores an image) and PositionComponent(stores the player position). Next, we have a RenderSystem which takes any entity that has an ImageComponent and a PositionComponent and then renders it. We tell our engine to make the entities and tell the engine that it needs to run the render system. Now When our engine runs any entity created that has an ImageComponent and a Position Component will be drawn. We can then create another entity this time an enemy with an ImageComponent and PositionComponent and it will automatically be added to the render system and rendered. We can then add new components for animations, AI, collisions and add their respective systems until we have all our game logic defined.
Adding Ashley to our project
To add Ashley to our project we are going to update our build.gradle file for our box2dtut project. In our main project box2dtut, scroll down to the build.gradle file and open it. Update the repositories to match this code:
|
1 2 3 4 5 6 7 8 9 10 |
buildscript { repositories { mavenCentral() maven { url "https://oss.sonatype.org/content/repositories/snapshots/" } maven { url "https://oss.sonatype.org/content/repositories/releases/" } } dependencies { classpath 'com.android.tools.build:gradle:1.5.0' } } |
Next, add the Ashley compile code for each platform as shown below:
|
1 2 3 4 5 6 7 8 9 10 11 12 13 14 15 16 17 18 19 20 21 22 23 24 25 26 27 28 29 30 31 32 33 34 35 36 37 38 39 40 41 42 43 44 45 46 47 48 |
project(":desktop") { apply plugin: "java" dependencies { compile project(":core") compile "com.badlogicgames.gdx:gdx-backend-lwjgl:$gdxVersion" compile "com.badlogicgames.gdx:gdx-platform:$gdxVersion:natives-desktop" compile "com.badlogicgames.gdx:gdx-box2d-platform:$gdxVersion:natives-desktop" compile "com.badlogicgames.ashley:ashley:1.7.0" } } project(":android") { apply plugin: "android" configurations { natives } dependencies { compile project(":core") compile "com.badlogicgames.gdx:gdx-backend-android:$gdxVersion" natives "com.badlogicgames.gdx:gdx-platform:$gdxVersion:natives-armeabi" natives "com.badlogicgames.gdx:gdx-platform:$gdxVersion:natives-armeabi-v7a" natives "com.badlogicgames.gdx:gdx-platform:$gdxVersion:natives-arm64-v8a" natives "com.badlogicgames.gdx:gdx-platform:$gdxVersion:natives-x86" natives "com.badlogicgames.gdx:gdx-platform:$gdxVersion:natives-x86_64" compile "com.badlogicgames.gdx:gdx-box2d:$gdxVersion" natives "com.badlogicgames.gdx:gdx-box2d-platform:$gdxVersion:natives-armeabi" natives "com.badlogicgames.gdx:gdx-box2d-platform:$gdxVersion:natives-armeabi-v7a" natives "com.badlogicgames.gdx:gdx-box2d-platform:$gdxVersion:natives-arm64-v8a" natives "com.badlogicgames.gdx:gdx-box2d-platform:$gdxVersion:natives-x86" natives "com.badlogicgames.gdx:gdx-box2d-platform:$gdxVersion:natives-x86_64" compile "com.badlogicgames.box2dlights:box2dlights:$box2DLightsVersion" compile "com.badlogicgames.ashley:ashley:1.7.0" } } project(":core") { apply plugin: "java" dependencies { compile "com.badlogicgames.gdx:gdx:$gdxVersion" compile "com.badlogicgames.gdx:gdx-box2d:$gdxVersion" compile "com.badlogicgames.box2dlights:box2dlights:$box2DLightsVersion" compile "com.badlogicgames.ashley:ashley:1.7.0" } } |
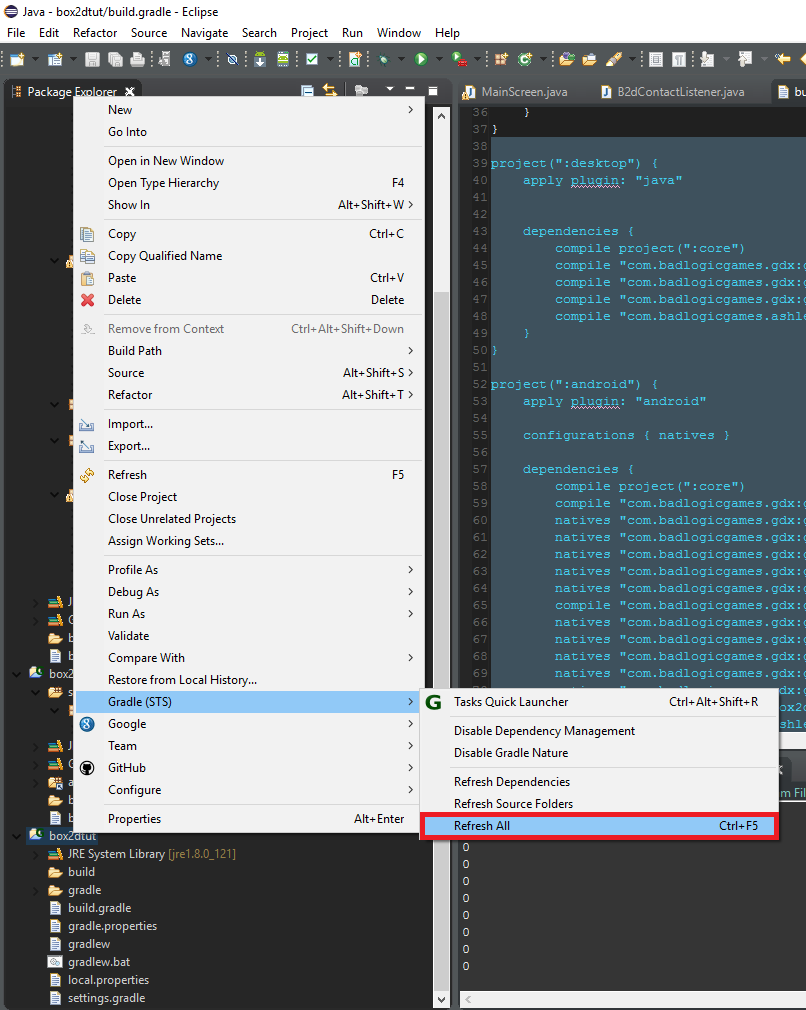
Refresh the grade dependencies for each project to make sure that Ashley has been added. Ashley should now be added and you can continue to add the code.
Creating A Component
The first thing we’re going to do now we have Ashley ion our project is to define our Components. Components are classes used solely for storing information for a specific set of data. Our first component will be for storing our positional data. So let’s make that now.
|
1 2 3 4 5 6 7 8 9 10 11 12 |
package blog.gamedevelopment.box2dtutorial.entity.components; import com.badlogic.ashley.core.Component; import com.badlogic.gdx.math.Vector2; import com.badlogic.gdx.math.Vector3; public class TransformComponent implements Component { public final Vector3 position = new Vector3(); public final Vector2 scale = new Vector2(1.0f, 1.0f); public float rotation = 0.0f; public boolean isHidden = false; } |
That’s it. A simple class that implements the Ashley Component interface and a few values. Cool, now let’s add a component for a texture:
|
1 2 3 4 5 6 7 8 |
package blog.gamedevelopment.box2dtutorial.entity.components; import com.badlogic.ashley.core.Component; import com.badlogic.gdx.graphics.g2d.TextureRegion; public class TextureComponent implements Component { public TextureRegion region = null; } |
Yay, another easy one….Well, they’re all easy as these are only for holding bits of data for our entities. Here are all the other Components we will be using:
|
1 2 3 4 5 6 7 8 9 |
package blog.gamedevelopment.box2dtutorial.entity.components; import com.badlogic.ashley.core.Component; import com.badlogic.gdx.graphics.g2d.Animation; import com.badlogic.gdx.utils.IntMap; public class AnimationComponent implements Component { public IntMap<Animation> animations = new IntMap<Animation>(); } |
|
1 2 3 4 5 6 7 8 9 |
package blog.gamedevelopment.box2dtutorial.entity.components; import com.badlogic.ashley.core.Component; import com.badlogic.gdx.physics.box2d.Body; public class B2dBodyComponent implements Component{ public Body body; } |
|
1 2 3 4 5 6 7 8 9 10 11 |
package blog.gamedevelopment.box2dtutorial.entity.components; import com.badlogic.ashley.core.Component; import com.badlogic.ashley.core.Entity; /* * Stores collision data such as entity that this entity has collided with */ public class CollisionComponent implements Component { public Entity collisionEntity;; } |
|
1 2 3 4 5 6 7 |
package blog.gamedevelopment.box2dtutorial.entity.components; import com.badlogic.ashley.core.Component; public class PlayerComponent implements Component{ } |
|
1 2 3 4 5 6 7 8 9 10 11 12 13 14 15 16 17 18 19 20 21 22 23 24 |
package blog.gamedevelopment.box2dtutorial.entity.components; import com.badlogic.ashley.core.Component; public class StateComponent implements Component { public static final int STATE_NORMAL = 0; public static final int STATE_JUMPING = 1; public static final int STATE_FALLING = 2; public static final int STATE_MOVING = 3; public static final int STATE_HIT = 4; private int state = 0; public float time = 0.0f; public boolean isLooping = false; public void set(int newState){ state = newState; time = 0.0f; } public int get(){ return state; } } |
|
1 2 3 4 5 6 7 8 9 10 11 12 13 14 15 |
package blog.gamedevelopment.box2dtutorial.entity.components; import com.badlogic.ashley.core.Component; /* * Stores the type of entity this is */ public class TypeComponent implements Component { public static final int PLAYER = 0; public static final int ENEMY = 1; public static final int SCENERY = 3; public static final int OTHER = 4; public int type = OTHER; } |
That’s all the Components currently needed in our game.
Systems
Let’s move on to doing a system which will be used to render our entities. Our system will loop through all entities that have the TransformComponent and TextureComponent and then use the data in these components to draw the texture in the correct location.
|
1 2 3 4 5 6 7 8 9 10 11 12 13 14 15 16 17 18 19 20 21 22 23 24 25 26 27 28 29 30 31 32 33 34 35 36 37 38 39 40 41 42 43 44 45 46 47 48 49 50 51 52 53 54 55 56 57 58 59 60 61 62 63 64 65 66 67 68 69 70 71 72 73 74 75 76 77 78 79 80 81 82 83 84 85 86 87 88 89 90 91 92 93 94 95 96 97 98 99 100 101 102 103 104 105 106 107 108 109 110 111 112 113 114 115 116 117 118 119 120 121 122 123 124 125 126 |
package blog.gamedevelopment.box2dtutorial.entity.systems; import blog.gamedevelopment.box2dtutorial.entity.components.TextureComponent; import blog.gamedevelopment.box2dtutorial.entity.components.TransformComponent; import com.badlogic.ashley.core.ComponentMapper; import com.badlogic.ashley.core.Entity; import com.badlogic.ashley.core.Family; import com.badlogic.ashley.systems.SortedIteratingSystem; import com.badlogic.gdx.Gdx; import com.badlogic.gdx.graphics.OrthographicCamera; import com.badlogic.gdx.graphics.g2d.SpriteBatch; import com.badlogic.gdx.math.Vector2; import com.badlogic.gdx.utils.Array; import java.util.Comparator; public class RenderingSystem extends SortedIteratingSystem { static final float PPM = 32.0f; // sets the amount of pixels each metre of box2d objects contains // this gets the height and width of our camera frustrum based off the width and height of the screen and our pixel per meter ratio static final float FRUSTUM_WIDTH = Gdx.graphics.getWidth()/PPM; static final float FRUSTUM_HEIGHT = Gdx.graphics.getHeight()/PPM; public static final float PIXELS_TO_METRES = 1.0f / PPM; // get the ratio for converting pixels to metres // static method to get screen width in metres private static Vector2 meterDimensions = new Vector2(); private static Vector2 pixelDimensions = new Vector2(); public static Vector2 getScreenSizeInMeters(){ meterDimensions.set(Gdx.graphics.getWidth()*PIXELS_TO_METRES, Gdx.graphics.getHeight()*PIXELS_TO_METRES); return meterDimensions; } // static method to get screen size in pixels public static Vector2 getScreenSizeInPixesl(){ pixelDimensions.set(Gdx.graphics.getWidth(), Gdx.graphics.getHeight()); return pixelDimensions; } // convenience method to convert pixels to meters public static float PixelsToMeters(float pixelValue){ return pixelValue * PIXELS_TO_METRES; } private SpriteBatch batch; // a reference to our spritebatch private Array<Entity> renderQueue; // an array used to allow sorting of images allowing us to draw images on top of each other private Comparator<Entity> comparator; // a comparator to sort images based on the z position of the transfromComponent private OrthographicCamera cam; // a reference to our camera // component mappers to get components from entities private ComponentMapper<TextureComponent> textureM; private ComponentMapper<TransformComponent> transformM; @SuppressWarnings("unchecked") public RenderingSystem(SpriteBatch batch) { // gets all entities with a TransofmComponent and TextureComponent super(Family.all(TransformComponent.class, TextureComponent.class).get(), new ZComparator()); //creates out componentMappers textureM = ComponentMapper.getFor(TextureComponent.class); transformM = ComponentMapper.getFor(TransformComponent.class); // create the array for sorting entities renderQueue = new Array<Entity>(); this.batch = batch; // set our batch to the one supplied in constructor // set up the camera to match our screen size cam = new OrthographicCamera(FRUSTUM_WIDTH, FRUSTUM_HEIGHT); cam.position.set(FRUSTUM_WIDTH / 2f, FRUSTUM_HEIGHT / 2f, 0); } @Override public void update(float deltaTime) { super.update(deltaTime); // sort the renderQueue based on z index renderQueue.sort(comparator); // update camera and sprite batch cam.update(); batch.setProjectionMatrix(cam.combined); batch.enableBlending(); batch.begin(); // loop through each entity in our render queue for (Entity entity : renderQueue) { TextureComponent tex = textureM.get(entity); TransformComponent t = transformM.get(entity); if (tex.region == null || t.isHidden) { continue; } float width = tex.region.getRegionWidth(); float height = tex.region.getRegionHeight(); float originX = width/2f; float originY = height/2f; batch.draw(tex.region, t.position.x - originX, t.position.y - originY, originX, originY, width, height, PixelsToMeters(t.scale.x), PixelsToMeters(t.scale.y), t.rotation); } batch.end(); renderQueue.clear(); } @Override public void processEntity(Entity entity, float deltaTime) { renderQueue.add(entity); } // convenience method to get camera public OrthographicCamera getCamera() { return cam; } } |
This code was adapted from code created by Barry @ https://github.com/RoaringCatGames to fit into this tutorial. I have added comments on all the parts I think may need explanation. Basically, this system will get all Entities that have a TextureComponent and a TransformComponent then loops through each one and draw it to the screen using the SpriteBatch.
In order for this system to work, we need to create the ZComparator system which is:
|
1 2 3 4 5 6 7 8 9 10 11 12 13 14 15 16 17 18 19 20 21 22 23 24 25 26 27 28 |
package blog.gamedevelopment.box2dtutorial.entity.systems; import blog.gamedevelopment.box2dtutorial.entity.components.TransformComponent; import com.badlogic.ashley.core.ComponentMapper; import com.badlogic.ashley.core.Entity; import java.util.Comparator; public class ZComparator implements Comparator<Entity> { private ComponentMapper<TransformComponent> cmTrans; public ZComparator(){ cmTrans= ComponentMapper.getFor(TransformComponent.class); } @Override public int compare(Entity entityA, Entity entityB) { float az = cmTrans.get(entityA).position.z; float bz = cmTrans.get(entityB).position.z; int res = 0; if(az > bz){ res = 1; }else if(az < bz){ res = -1; } return res; } } |
Now onto all the other systems used:
|
1 2 3 4 5 6 7 8 9 10 11 12 13 14 15 16 17 18 19 20 21 22 23 24 25 26 27 28 29 30 31 32 33 34 35 36 37 38 39 40 41 42 |
package blog.gamedevelopment.box2dtutorial.entity.systems; import blog.gamedevelopment.box2dtutorial.entity.components.AnimationComponent; import blog.gamedevelopment.box2dtutorial.entity.components.StateComponent; import blog.gamedevelopment.box2dtutorial.entity.components.TextureComponent; import com.badlogic.ashley.core.ComponentMapper; import com.badlogic.ashley.core.Entity; import com.badlogic.ashley.core.Family; import com.badlogic.ashley.systems.IteratingSystem; public class AnimationSystem extends IteratingSystem { ComponentMapper<TextureComponent> tm; ComponentMapper<AnimationComponent> am; ComponentMapper<StateComponent> sm; @SuppressWarnings("unchecked") public AnimationSystem(){ super(Family.all(TextureComponent.class, AnimationComponent.class, StateComponent.class).get()); tm = ComponentMapper.getFor(TextureComponent.class); am = ComponentMapper.getFor(AnimationComponent.class); sm = ComponentMapper.getFor(StateComponent.class); } @Override protected void processEntity(Entity entity, float deltaTime) { AnimationComponent ani = am.get(entity); StateComponent state = sm.get(entity); if(ani.animations.containsKey(state.get())){ TextureComponent tex = tm.get(entity); tex.region = ani.animations.get(state.get()).getKeyFrame(state.time, state.isLooping); } state.time += deltaTime; } } |
|
1 2 3 4 5 6 7 8 9 10 11 12 13 14 15 16 17 18 19 20 21 22 23 24 25 26 27 28 29 30 31 32 33 34 35 36 37 38 39 40 41 42 43 44 45 46 47 48 49 50 51 52 53 54 |
package blog.gamedevelopment.box2dtutorial.entity.systems; import blog.gamedevelopment.box2dtutorial.entity.components.CollisionComponent; import blog.gamedevelopment.box2dtutorial.entity.components.PlayerComponent; import blog.gamedevelopment.box2dtutorial.entity.components.TypeComponent; import com.badlogic.ashley.core.ComponentMapper; import com.badlogic.ashley.core.Entity; import com.badlogic.ashley.core.Family; import com.badlogic.ashley.systems.IteratingSystem; public class CollisionSystem extends IteratingSystem { ComponentMapper<CollisionComponent> cm; ComponentMapper<PlayerComponent> pm; @SuppressWarnings("unchecked") public CollisionSystem() { // only need to worry about player collisions super(Family.all(CollisionComponent.class,PlayerComponent.class).get()); cm = ComponentMapper.getFor(CollisionComponent.class); pm = ComponentMapper.getFor(PlayerComponent.class); } @Override protected void processEntity(Entity entity, float deltaTime) { // get player collision component CollisionComponent cc = cm.get(entity); Entity collidedEntity = cc.collisionEntity; if(collidedEntity != null){ TypeComponent type = collidedEntity.getComponent(TypeComponent.class); if(type != null){ switch(type.type){ case TypeComponent.ENEMY: //do player hit enemy thing System.out.println("player hit enemy"); break; case TypeComponent.SCENERY: //do player hit scenery thing System.out.println("player hit scenery"); break; case TypeComponent.OTHER: //do player hit other thing System.out.println("player hit other"); break; //technically this isn't needed } cc.collisionEntity = null; // collision handled reset component } } } } |
|
1 2 3 4 5 6 7 8 9 10 11 12 13 14 15 16 17 18 19 20 21 22 23 24 25 26 27 28 29 30 31 32 33 34 |
package blog.gamedevelopment.box2dtutorial.entity.systems; import com.badlogic.ashley.core.Entity; import com.badlogic.ashley.core.Family; import com.badlogic.ashley.systems.IteratingSystem; import com.badlogic.gdx.graphics.OrthographicCamera; import com.badlogic.gdx.physics.box2d.Box2DDebugRenderer; import com.badlogic.gdx.physics.box2d.World; public class PhysicsDebugSystem extends IteratingSystem { private Box2DDebugRenderer debugRenderer; private World world; private OrthographicCamera camera; public PhysicsDebugSystem(World world, OrthographicCamera camera){ super(Family.all().get()); debugRenderer = new Box2DDebugRenderer(); this.world = world; this.camera = camera; } @Override public void update(float deltaTime) { super.update(deltaTime); debugRenderer.render(world, camera.combined); } @Override protected void processEntity(Entity entity, float deltaTime) { } } |
|
1 2 3 4 5 6 7 8 9 10 11 12 13 14 15 16 17 18 19 20 21 22 23 24 25 26 27 28 29 30 31 32 33 34 35 36 37 38 39 40 41 42 43 44 45 46 47 48 49 50 51 52 53 54 55 56 57 58 59 60 |
package blog.gamedevelopment.box2dtutorial.entity.systems; import blog.gamedevelopment.box2dtutorial.entity.components.B2dBodyComponent; import blog.gamedevelopment.box2dtutorial.entity.components.TransformComponent; import com.badlogic.ashley.core.ComponentMapper; import com.badlogic.ashley.core.Entity; import com.badlogic.ashley.core.Family; import com.badlogic.ashley.systems.IteratingSystem; import com.badlogic.gdx.math.MathUtils; import com.badlogic.gdx.math.Vector2; import com.badlogic.gdx.physics.box2d.World; import com.badlogic.gdx.utils.Array; public class PhysicsSystem extends IteratingSystem { private static final float MAX_STEP_TIME = 1/45f; private static float accumulator = 0f; private World world; private Array<Entity> bodiesQueue; private ComponentMapper<B2dBodyComponent> bm = ComponentMapper.getFor(B2dBodyComponent.class); private ComponentMapper<TransformComponent> tm = ComponentMapper.getFor(TransformComponent.class); @SuppressWarnings("unchecked") public PhysicsSystem(World world) { super(Family.all(B2dBodyComponent.class, TransformComponent.class).get()); this.world = world; this.bodiesQueue = new Array<Entity>(); } @Override public void update(float deltaTime) { super.update(deltaTime); float frameTime = Math.min(deltaTime, 0.25f); accumulator += frameTime; if(accumulator >= MAX_STEP_TIME) { world.step(MAX_STEP_TIME, 6, 2); accumulator -= MAX_STEP_TIME; //Entity Queue for (Entity entity : bodiesQueue) { TransformComponent tfm = tm.get(entity); B2dBodyComponent bodyComp = bm.get(entity); Vector2 position = bodyComp.body.getPosition(); tfm.position.x = position.x; tfm.position.y = position.y; tfm.rotation = bodyComp.body.getAngle() * MathUtils.radiansToDegrees; } } bodiesQueue.clear(); } @Override protected void processEntity(Entity entity, float deltaTime) { bodiesQueue.add(entity); } } |
|
1 2 3 4 5 6 7 8 9 10 11 12 13 14 15 16 17 18 19 20 21 22 23 24 25 26 27 28 29 30 31 32 33 34 35 36 37 38 39 40 41 42 43 44 45 46 47 48 49 50 51 52 53 54 55 56 57 58 59 60 61 62 63 64 65 66 |
package blog.gamedevelopment.box2dtutorial.entity.systems; import blog.gamedevelopment.box2dtutorial.controller.KeyboardController; import blog.gamedevelopment.box2dtutorial.entity.components.B2dBodyComponent; import blog.gamedevelopment.box2dtutorial.entity.components.PlayerComponent; import blog.gamedevelopment.box2dtutorial.entity.components.StateComponent; import com.badlogic.ashley.core.ComponentMapper; import com.badlogic.ashley.core.Entity; import com.badlogic.ashley.core.Family; import com.badlogic.ashley.systems.IteratingSystem; import com.badlogic.gdx.math.MathUtils; public class PlayerControlSystem extends IteratingSystem{ ComponentMapper<PlayerComponent> pm; ComponentMapper<B2dBodyComponent> bodm; ComponentMapper<StateComponent> sm; KeyboardController controller; @SuppressWarnings("unchecked") public PlayerControlSystem(KeyboardController keyCon) { super(Family.all(PlayerComponent.class).get()); controller = keyCon; pm = ComponentMapper.getFor(PlayerComponent.class); bodm = ComponentMapper.getFor(B2dBodyComponent.class); sm = ComponentMapper.getFor(StateComponent.class); } @Override protected void processEntity(Entity entity, float deltaTime) { B2dBodyComponent b2body = bodm.get(entity); StateComponent state = sm.get(entity); if(b2body.body.getLinearVelocity().y > 0){ state.set(StateComponent.STATE_FALLING); } if(b2body.body.getLinearVelocity().y == 0){ if(state.get() == StateComponent.STATE_FALLING){ state.set(StateComponent.STATE_NORMAL); } if(b2body.body.getLinearVelocity().x != 0){ state.set(StateComponent.STATE_MOVING); } } if(controller.left){ b2body.body.setLinearVelocity(MathUtils.lerp(b2body.body.getLinearVelocity().x, -5f, 0.2f),b2body.body.getLinearVelocity().y); } if(controller.right){ b2body.body.setLinearVelocity(MathUtils.lerp(b2body.body.getLinearVelocity().x, 5f, 0.2f),b2body.body.getLinearVelocity().y); } if(!controller.left && ! controller.right){ b2body.body.setLinearVelocity(MathUtils.lerp(b2body.body.getLinearVelocity().x, 0, 0.1f),b2body.body.getLinearVelocity().y); } if(controller.up && (state.get() == StateComponent.STATE_NORMAL || state.get() == StateComponent.STATE_MOVING)){ //b2body.body.applyForceToCenter(0, 3000,true); b2body.body.applyLinearImpulse(0, 75f, b2body.body.getWorldCenter().x,b2body.body.getWorldCenter().y, true); state.set(StateComponent.STATE_JUMPING); } } } |
I’m sure a lot of you are thinking about how much code I just spurted out just now. But be assured this code is laying a foundation for us so we don’t have to write as much code later and our code is nicely organised into specific areas which allow us to add/remove/update new features later with minimal hassle.
Adding the Engine
Now we have all the components and systems in place we can make a start on removing the model and adding our Engine in our MainScreen. Since we are no longer using the model we need to add all the necessary parts used in the model to our main screen. this includes things like the sounds, atlas and the box2d world. Update your MainScreen constructor to match the following:
|
1 2 3 4 5 6 7 8 9 10 11 12 13 14 15 16 17 18 19 20 21 22 23 24 25 26 27 28 29 30 31 32 33 34 35 36 37 38 39 40 |
public MainScreen(Box2DTutorial box2dTutorial) { parent = box2dTutorial; controller = new KeyboardController(); world = new World(new Vector2(0,-10f), true); world.setContactListener(new B2dContactListener()); bodyFactory = BodyFactory.getInstance(world); parent.assMan.queueAddSounds(); parent.assMan.manager.finishLoading(); atlas = parent.assMan.manager.get("images/game.atlas", TextureAtlas.class); ping = parent.assMan.manager.get("sounds/ping.wav",Sound.class); boing = parent.assMan.manager.get("sounds/boing.wav",Sound.class); sb = new SpriteBatch(); // Create our new rendering system RenderingSystem renderingSystem = new RenderingSystem(sb); cam = renderingSystem.getCamera(); sb.setProjectionMatrix(cam.combined); //create a pooled engine engine = new PooledEngine(); // add all the relevant systems our engine should run engine.addSystem(new AnimationSystem()); engine.addSystem(renderingSystem); engine.addSystem(new PhysicsSystem(world)); engine.addSystem(new PhysicsDebugSystem(world, renderingSystem.getCamera())); engine.addSystem(new CollisionSystem()); engine.addSystem(new PlayerControlSystem(controller)); // create some game objects createPlayer(); createPlatform(2,2); createPlatform(2,7); createPlatform(7,2); createPlatform(7,7); createFloor(); } |
Here you can see we moved all the required items to our MainScreen and added some new stuff. The first new item we added was the RenderingSystem. This is the RenderingSystem we just added at the start of this chapter. Next, we created a PooledEngine. This is supplied by the Ashley system and the Pooled version reuses objects instead of creating new ones reducing lag from Garbage Collection. Then we continue to add all our other systems we made and finally we create some objects in our world, a player and some platforms. The code for these objects is in the next section.
Adding Entities
We got components, systems and engines, but no entities. Let’s fix that now by adding them. As you seen were adding them using these 3 methods; createPlayer(), createPlatform(x,y) and createFloor(); The createPlayer() method below shows how we add a player entity:
|
1 2 3 4 5 6 7 8 9 10 11 12 13 14 15 16 17 18 19 20 21 22 23 24 25 26 27 28 29 30 31 32 33 34 |
private void createPlayer(){ // Create the Entity and all the components that will go in the entity Entity entity = engine.createEntity(); B2dBodyComponent b2dbody = engine.createComponent(B2dBodyComponent.class); TransformComponent position = engine.createComponent(TransformComponent.class); TextureComponent texture = engine.createComponent(TextureComponent.class); PlayerComponent player = engine.createComponent(PlayerComponent.class); CollisionComponent colComp = engine.createComponent(CollisionComponent.class); TypeComponent type = engine.createComponent(TypeComponent.class); StateComponent stateCom = engine.createComponent(StateComponent.class); // create the data for the components and add them to the components b2dbody.body = bodyFactory.makeCirclePolyBody(10,10,1, BodyFactory.STONE, BodyType.DynamicBody,true); // set object position (x,y,z) z used to define draw order 0 first drawn position.position.set(10,10,0); texture.region = atlas.findRegion("player"); type.type = TypeComponent.PLAYER; stateCom.set(StateComponent.STATE_NORMAL); b2dbody.body.setUserData(entity); // add the components to the entity entity.add(b2dbody); entity.add(position); entity.add(texture); entity.add(player); entity.add(colComp); entity.add(type); entity.add(stateCom); // add the entity to the engine engine.addEntity(entity); } |
Here we first use the engine to create and empty Entity. We then use the Engine to create all the components that make up the player entity. We then create all the data that fills up the components such as image, position and box2d body. Next, we add the components to the Player Entity and finally add the player Entity to the engine.
The createPlatform(x,y) and createFloor() are pretty much the same as above but they require less components. Code below:
|
1 2 3 4 5 6 7 8 9 10 11 12 13 14 15 16 17 18 19 20 21 22 23 24 25 26 27 28 29 30 31 32 33 34 35 |
private void createPlatform(float x, float y){ Entity entity = engine.createEntity(); B2dBodyComponent b2dbody = engine.createComponent(B2dBodyComponent.class); b2dbody.body = bodyFactory.makeBoxPolyBody(x, y, 3, 0.2f, BodyFactory.STONE, BodyType.StaticBody); TextureComponent texture = engine.createComponent(TextureComponent.class); texture.region = atlas.findRegion("player"); TypeComponent type = engine.createComponent(TypeComponent.class); type.type = TypeComponent.SCENERY; b2dbody.body.setUserData(entity); entity.add(b2dbody); entity.add(texture); entity.add(type); engine.addEntity(entity); } private void createFloor(){ Entity entity = engine.createEntity(); B2dBodyComponent b2dbody = engine.createComponent(B2dBodyComponent.class); b2dbody.body = bodyFactory.makeBoxPolyBody(0, 0, 100, 0.2f, BodyFactory.STONE, BodyType.StaticBody); TextureComponent texture = engine.createComponent(TextureComponent.class); texture.region = atlas.findRegion("player"); TypeComponent type = engine.createComponent(TypeComponent.class); type.type = TypeComponent.SCENERY; b2dbody.body.setUserData(entity); entity.add(b2dbody); entity.add(texture); entity.add(type); engine.addEntity(entity); } |
There’s one more thing to do before our game will work and that is to update our Box2dContactListener to update Entities when they contact other items. The new updated Contact Listener is:
|
1 2 3 4 5 6 7 8 9 10 11 12 13 14 15 16 17 18 19 20 21 22 23 24 25 26 27 28 29 30 31 32 33 34 35 36 37 38 39 40 41 42 43 44 45 46 47 48 49 50 51 52 53 54 55 56 57 58 59 60 61 |
package blog.gamedevelopment.box2dtutorial; import blog.gamedevelopment.box2dtutorial.entity.components.CollisionComponent; import com.badlogic.ashley.core.Entity; import com.badlogic.gdx.physics.box2d.Contact; import com.badlogic.gdx.physics.box2d.ContactImpulse; import com.badlogic.gdx.physics.box2d.ContactListener; import com.badlogic.gdx.physics.box2d.Fixture; import com.badlogic.gdx.physics.box2d.Manifold; public class B2dContactListener implements ContactListener { public B2dContactListener(){ } @Override public void beginContact(Contact contact) { System.out.println("Contact"); Fixture fa = contact.getFixtureA(); Fixture fb = contact.getFixtureB(); System.out.println(fa.getBody().getType()+" has hit "+ fb.getBody().getType()); if(fa.getBody().getUserData() instanceof Entity){ Entity ent = (Entity) fa.getBody().getUserData(); entityCollision(ent,fb); return; }else if(fb.getBody().getUserData() instanceof Entity){ Entity ent = (Entity) fb.getBody().getUserData(); entityCollision(ent,fa); return; } } private void entityCollision(Entity ent, Fixture fb) { if(fb.getBody().getUserData() instanceof Entity){ Entity colEnt = (Entity) fb.getBody().getUserData(); CollisionComponent col = ent.getComponent(CollisionComponent.class); CollisionComponent colb = colEnt.getComponent(CollisionComponent.class); if(col != null){ col.collisionEntity = colEnt; }else if(colb != null){ colb.collisionEntity = ent; } } } @Override public void endContact(Contact contact) { System.out.println("Contact end"); } @Override public void preSolve(Contact contact, Manifold oldManifold) { } @Override public void postSolve(Contact contact, ContactImpulse impulse) { } } |
Here you can see we got rid of all the bloat and now only need to update the entity collisionComponent when something is hit.
Before we can run this code we need to update our MainScreen’s render method to make the engine run.
|
1 2 3 4 5 6 7 |
@Override public void render(float delta) { Gdx.gl.glClearColor(0f, 0f, 0f, 1); Gdx.gl.glClear(GL20.GL_COLOR_BUFFER_BIT); engine.update(delta); } |
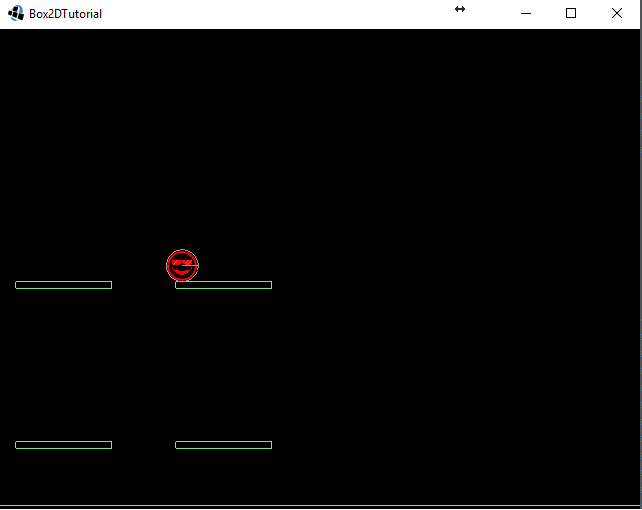
You should now be able to run the project and control the player and make it jump on the platforms.
As usual, the code for this part can be downloaded from StorMyVids here.
In the next part we will add infinite level generation using simplex noise.
| ← Scene2D | — Contents — | Simplex Noise Level Gen → |
Don’t you need to add Pool.poolable interface to your components class? if not, info on ashley’s wiki is wrong though.
Yes, you are correct. If you need to destroy Ashley entities and then recreate them you will end up with entities with properties carried over. Later in this tutorial series, we will go over this issue and fix it.
Thanks for quick reply. Tutorials are really helpful. Piece by piece, fits together.
Can’t get Ashley into my IdeaJ
Do you get an error message of some sort or is it unable to find the Ashley classes?
I am not sure but I think I wrote some stuff in the wrong gradle file. I restarted this time and just included Ashley and Box2Dlighting and everything it offers instead of trying to import things.
The only mystery that remains is “cmTrans” in “ZComparator”. Where is it? It’s not in the scope.
Ah that seems to be a typo in the code. The transformM in that section should be cmTrans. I have updated the guide.
I think you missed the following in your MainScreen.render() method:
Gdx.gl.glClearColor(0f, 0f, 0f, 1);
Gdx.gl.glClear(GL20.GL_COLOR_BUFFER_BIT);
engine.update(delta);
Yes, you are correct. I have added it to the guide.
Hi,
when i try to add Ashley to my Project and updating my build.gradle, i do rightclick on the project -> gradle -> refresh gradle project, then i get the following error:
FAILURE: Build failed with an exception.
* Where:
Build file ‘…\core\build.gradle’ line: 60
* What went wrong:
A problem occurred evaluating project ‘:core’.
> Cannot change dependencies of configuration ‘:android:natives’ after it has been resolved.
Can you help me again?
Another Question: how can i import your source code into my eclipse? i tried several times with different approaches but with no success
Quick question, why not use a IntervalIteratingSystem for PhysicsSystem… it looks like that’s exactly what you’re reimplementing.
A system that updates at a certain interval…
Or (and this is in all honestly, not trying to sound like a dick :P) has this tutorial been written before Interval systems were added to ashley?
Honestly, I didn’t know it existed. The task was simple enough that I didn’t need to look for a premade solution. In retrospect adding it would of made the tutorial a bit more complete.
Hello,
Thank your tutorials which are all very great. But I’m lost at this one. I like to understand every letters of the code, and right now, even after read the code several times I can’t understand all. Do you have any advice to understand everything ? (external links, or other)
Some of The tutorial sites I used to learn Libgdx are:
https://www.gamefromscratch.com/page/LibGDX-Tutorial-series.aspx
https://github.com/libgdx/libgdx/wiki
https://www.redblobgames.com/
If you’re having issues with a particular extension E.g Ashley ECS then browse for their wiki.
If all else fails you can always use a forum or service like StackOverflow to summon a code jedi.
These are great and I really appreciate them. This one, however, was like when you’re doing a drawing tutorial:
Step one: Draw a circle
Me: Got it, feeling good
Step two: Draw the rest of the dragon
I understand the overall concept but the details only about a quarter.
Hello Jesse – I found that reading the Ashley Wiki and understanding the CES architecture helped me out. Not sure if that will help you, but I feel this step in the series is a big leap, but still very useful content to be placed within it. If you spend more time understanding the concepts first (Component Entity Systems), then the Ashley System (this is basically the same as CES) and writing out every component listed above, you will grasp it much more firmly.
Hope it helps – Cheers!
Honestly, I would be completely LOST If I hadn’t read Ashley’s wiki and this article first: https://www.gamedev.net/articles/programming/general-and-gameplay-programming/understanding-component-entity-systems-r3013/
I highly recommend spending more time understanding the core concepts of ECS before continuing the tutorial.
What is the advantage of using the update method in IteratingSystem? Should we use it or just do everything in the processEntity method?
hey John – Thanks for this write-up. I’ve been following along and gotten stuck.
I was able to get the game to a running state with all the code from this Step in the series, but I couldn’t get my keyboard inputs to read or react on the player properly. While debugging, I could clearly see that the keyboard controller is not null and linked to my PlayerComponent. I thought it was the Gdx.setInputProcessor, but this is set accordingly in my show() and I’ve actually also included it in my resume (not that it made a difference). What do you think it could be?
Any help is appreciated – Thanks in advance!
ACtually I don’t know if keyboard controller is linked to my PlayerComponent.
I am passing the KeyboardController created within my MainScreen into the PlayerControlSystem, but it doesn’t seem to pick up any of my keypresses when i check using printlns.
I figured it out. I didn’t add the entity to my engine. fml.
I’ve been looking at the screen for too long.
Thanks.