
Full Unity 2D Game Tutorial 2019 – Player Movement
In this section of the tutorial we will create a player object that we can control with the keyboard or controller. We will then focus on Player Movement using the physics engine provided in unity.
Full Unity 2D Game Tutorial 2019 – Creating the player object
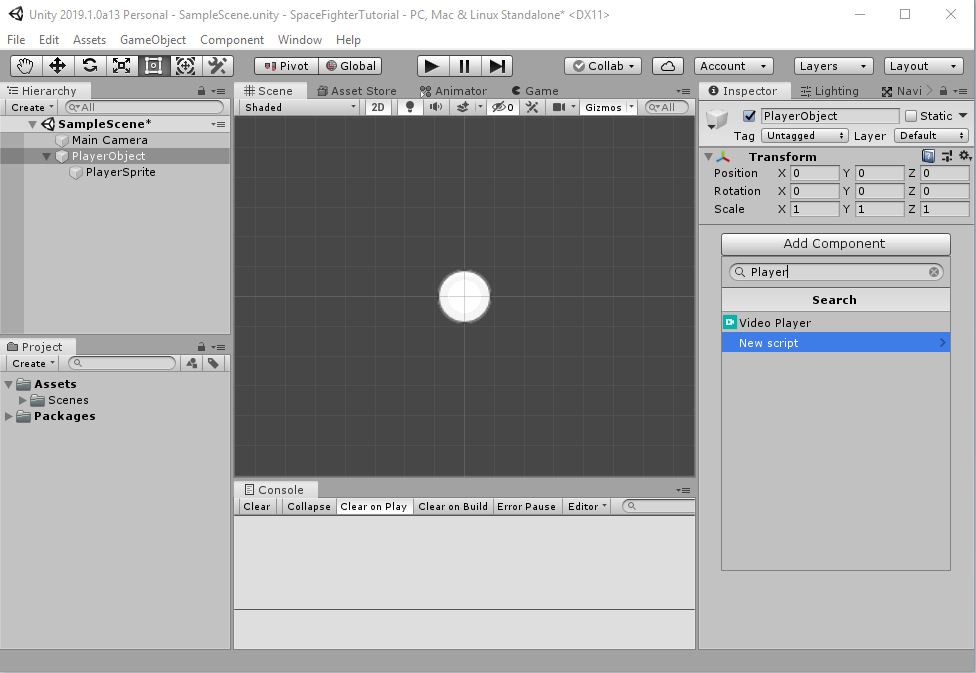
The first step is to right click in your Hierarchy view. This will bring up a menu where we can add all the things. We won’t though, we just need to create a single empty GameObject by clicking the Create Empty option. This will create a new item in the hierarchy. With the new object selected in the hierarchy view press F2 or right click rename to rename the object to PlayerObject. This will be the root element of our player. It will hold all the objects that make up our player such as sprites.
Now, lets add a sprite to our PlayerObject so we can see our player in both the Scene view and game view. To do that we select the PlayerObject and right click to get the context menu again and select 2D Object > Sprite. We have added a Sprite to our player but we still can’t see anything??? This is due to the default sprite not having any image associated with it. We will add that now. With the New Sprite object selected view the inspector window and click the nipple (yes that’s what its called, no giggling we’re a mature game developer). A new window pops up with all the Sprites you have by default in your project. Select the Knob(no giggling) by double clicking it or hitting the enter key with it selected.
 Yay! we should now be able to see out player in the Scene view. Let’s rename the New Sprite to something that will help identify what this object is like PlayerSprite.
Full Unity 2D Game Tutorial 2019 – Coding our Player Movement
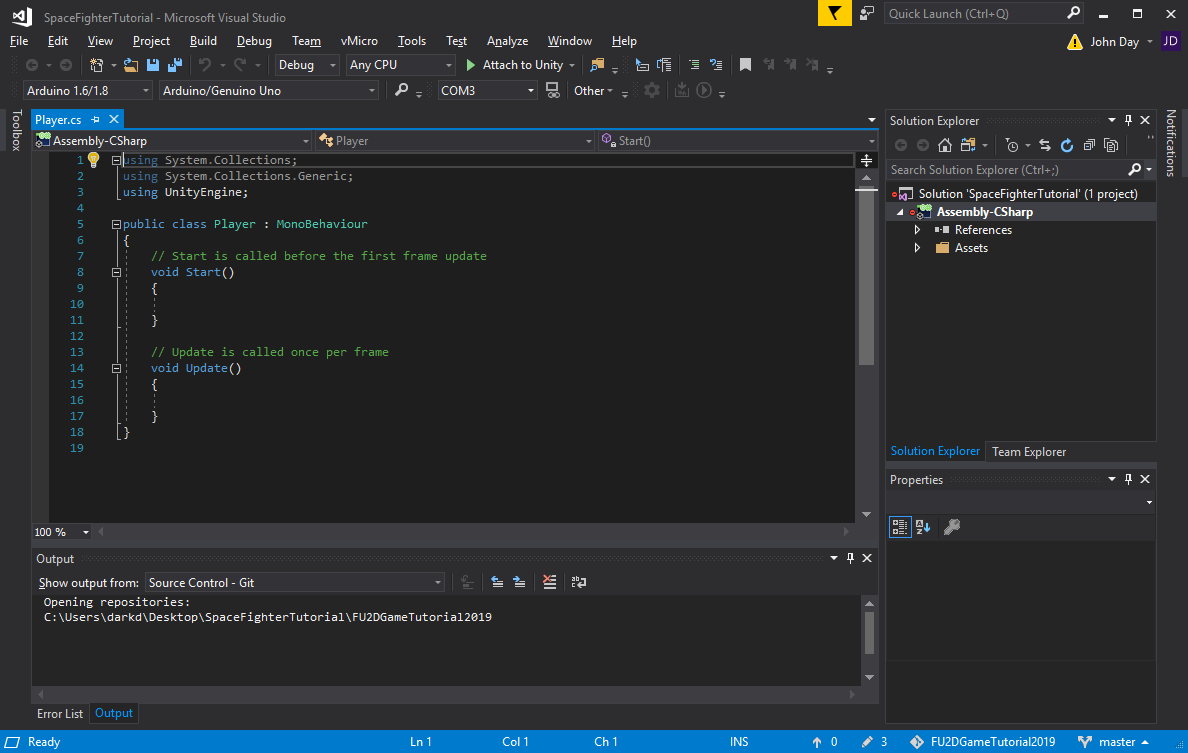
Our player doesn’t do much at the moment because we haven’t told it to do anything yet. In order to do that we must add some code. Since we want the code to affect the player and all it’s components we will add the code to the PlayerObject. With the PlayerObject selected go to the Inspector window and click the Add Component button. Here we can add all sorts of prebuild components but for now lets just add a Player script. Type Player in the search bar at the top to get selection of Video Player or New script. Select new script and click the Create and Add button to make the script for us.
 We now have a script in our project called Player. Eventually we will have a lot of scripts and it will become hard to find things in the Project window so lets make things easier for our future selves by creating a folder and calling it Scripts. This will house all our future scripts and keep the Project view organized for us. Simply drag and drop the Player script into the Scripts folder and let’s continue.

Double clicking our Player script should open visual studio with the Player script already open in the code view window. When a script is first created you are given 2 methods; Start and Update. The Start method is called once when the object is created and Update is called once per frame after. This allows us to setup the player with values once in the start method and then update the player in the Update method from then on.
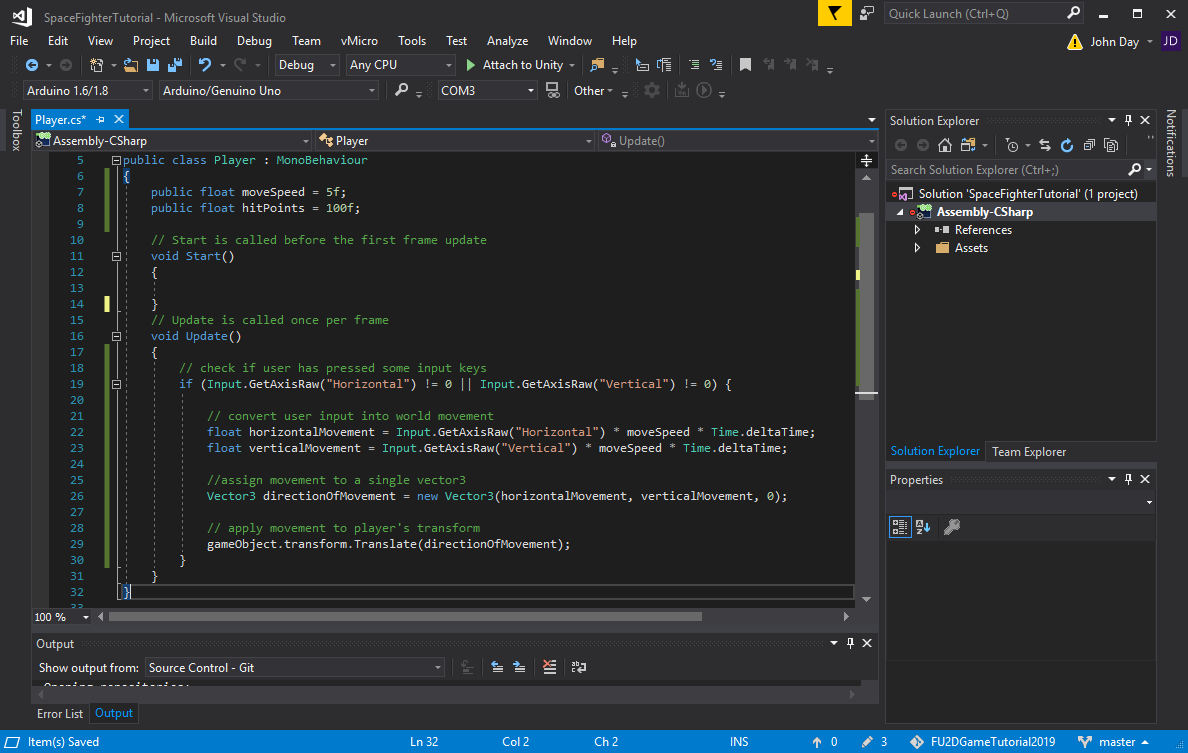
In the first part of our code add these two variables. These will be used to set our player speed and health.
|
1 2 3 4 5 6 |
public class Player : MonoBehaviour { public float moveSpeed = 5f; public float hitPoints = 100f; //.... rest of code |
As these variable have been declared with public so we will be able to see the in the unity Inspector view and we will be able to change them from inside unity.
In our update method add the following code
|
1 2 3 4 5 6 7 8 9 10 11 12 13 |
// check if user has pressed some input keys if (Input.GetAxisRaw("Horizontal") != 0 || Input.GetAxisRaw("Vertical") != 0) { // convert user input into world movement float horizontalMovement = Input.GetAxisRaw("Horizontal") * moveSpeed * Time.deltaTime; float verticalMovement = Input.GetAxisRaw("Vertical") * moveSpeed * Time.deltaTime; //assign movement to a single vector3 Vector3 directionOfMovement = new Vector3(horizontalMovement, verticalMovement, 0); // apply movement to player's transform gameObject.transform.Translate(directionOfMovement); } |
Here we have used the Input.GetAxisRaw(“Horizontal”) method provided for us by Unity which allows us to get an input value off the player. This value will be -1 if the A or left arrow key is pressed, 1 if D or right arrow is pressed and 0 if neither are pressed. The same goes for the Vertical variant with W,S,Up arrow, Down Arrow. Next we convert this raw input value into a value effected by the moveSpeed. Since this Update method is run every frame we want to use the Time.deltaTime to make the value 1 frame worth of movement. Without using Time.deltaTime we will move a whole seconds worth of movement in a single frame.
Next we create a Vector3 called directionOfMovement which will hold both our horizontal and vertical movement in a single variable. A Vector3 is more than just a variable, it is a position or direction in 3D space. Why are we using something for 3D in 2D, well in short unity still works in 3D even when using 2D it just shows us the 3D world in 2D. This is why we left the 3rd parameter in the Vector3 as zero. Plus our next step is to apply our movement to our player and that method accepts a 3D Vector.
To apply our movement to our player we need to adjust the player’s transform. The transform is the object on our player that stores the position, rotation and scale of our player. We move our transform with the Translate method which takes our Vector3 directionOfMovement. And that’s it for this section of coding.
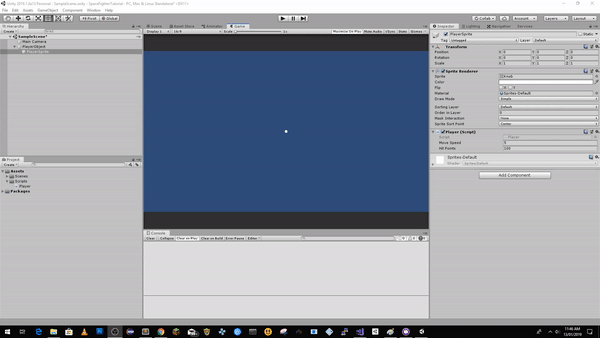
Save our script with ctrl+s or File>save and return to our unity window. Now if we press that play button located at the top center of the Unity window we will be able to move our player with the W,A,S,D or arrow keys.
This movement is great for simple games. but we want to do things a bit more advanced. For example we may want our player to fall with gravity or get pushed by forces such as fans or magnets. For these effects we will want to add a RigidBody.
Full Unity 2D Game Tutorial 2019 – Player Movement Physics
A RigidBody is a physics component which allows us to use the built in physics engine that comes with Unity. Since we’re making a 2D game we will add a RigidBody2D to out player object. This is done the same way we added a script. Select the PlayerObject, Add Component, Type Rigid and select the RigidBody2D object in the menu.
Once that done we will have a new component in our PlayerObject’s Inspector window. Now if we press play our player will fall off the screen..Uh oh! we broke it. Thats because we have applied physics to our player and all objects are affected by gravity. Let’s turn that off. In our Inspector adjust the properties of our RigidBody so there is no gravity, also while we’re here lets switch to Interpolate for our Interpolate option. This makes the player render without the jerky movement caused by the difference in timing between the physics engine and the render engine.

We have added a physics body to our player but we’re still bypassing it by directly moving the player’s transform. We don’t want that, we want physics!
Full Unity 2D Game Tutorial 2019 – Player Movement Physics Code
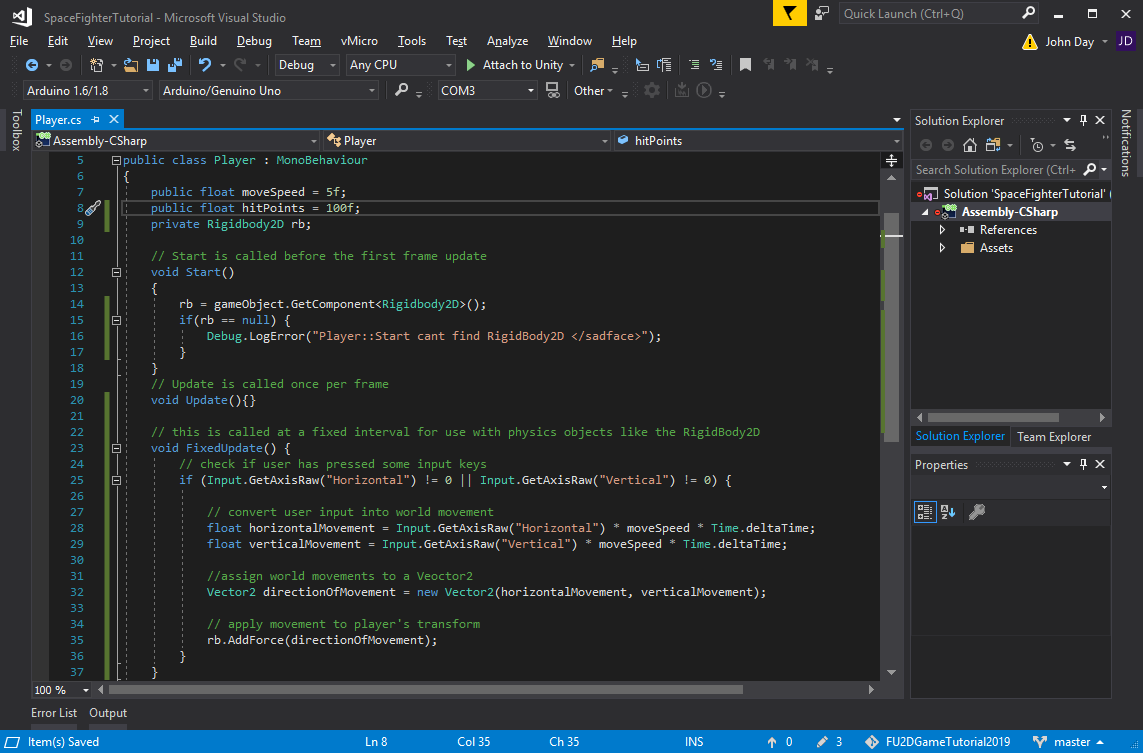
Again we have to do some coding. So open up the Player script again by double clicking it or going back to Visual Studio if you left it open. In our Player script we need to know about our new RigidBody2D object so let’s create a variable that will store our RigidBody.
|
1 2 3 4 5 6 7 |
public class Player : MonoBehaviour { public float moveSpeed = 5f; public float hitPoints = 100f; private Rigidbody2D rb; //.. more code |
Here we have added our RigidBody2D variable with private declaration. This is because we don’t need unity to display anything about this variable, it already knows about the component we’re going to store in it. So, let’s store the component in our fresh new variable. We do that by using the GetComponent method provided by unity. Update our Start method with the following code
|
1 2 3 4 5 6 7 8 |
// Start is called before the first frame update void Start() { rb = gameObject.GetComponent<Rigidbody2D>(); if(rb == null) { Debug.LogError("Player::Start cant find RigidBody2D </sadface>"); } } |
Here we assign rb by telling the gameObject(the PlayerObject this script is attached to) to GetComponet<RigidBody2D>(). This will put the first RigidBody2D it finds on the PlayerObject into the rb variable. If we had 2 RigidBody2D objects on our player only the first would be put in our rb variable. Next we verify that the rb variable has something in it, if it doesn’t e.g. it is null then we log an error to our console.
So now we have a reference to our RigidBody2D in our player script lets use it. First lets make a new method called FixedUpdate (type fixed then press tab) FixedUpdate is another built in method that runs once per physics step. Since physics is a bunch of complicated and time consuming math processes it is processed less often than the update method so anytime we are using physics objects we do it in the FixedUpdate method. Add the following code and remove the old Update code.
|
1 2 3 4 5 6 7 8 9 10 11 12 13 14 15 16 |
// this is called at a fixed interval for use with physics objects like the RigidBody2D void FixedUpdate() { // check if user has pressed some input keys if (Input.GetAxisRaw("Horizontal") != 0 || Input.GetAxisRaw("Vertical") != 0) { // convert user input into world movement float horizontalMovement = Input.GetAxisRaw("Horizontal") * moveSpeed * Time.deltaTime; float verticalMovement = Input.GetAxisRaw("Vertical") * moveSpeed * Time.deltaTime; //assign world movements to a Veoctor2 Vector2 directionOfMovement = new Vector2(horizontalMovement, verticalMovement); // apply movement to player's transform rb.AddForce(directionOfMovement); } } |
The code is pretty much the same except we now use a Vector2 for the directionOfMovement and instead of adjusting the transform of our object we add force to our RigidBody2D. From now on the RigidBody2D will move our transform for us based on the forces we give it in the AddForce method.
Our player is now updated by our physics engine and we can now test this in Unity by saving and playing in Unity. It may seem like the player isn’t even moving, that’s because we’re still using the Time.deltaTime to modify our input values. Time.deltaTime is a value based on the frames per second and isn’t tied to our physics engine. We can fix this by removing the * Time.deltaTime parts in our code.
 Woot! we have our player moving based on the physics now.
The completed source for this tutorial is available on Github here
Part 1 – Creating the Project – Part 3 – Background and Camera
I’m Confused, it says that horizontalMovement & verticalMovement haven’t been called, is that supposed to be called somewhere?
hey its been a while since you posted this but did you fix it ? it didnt tell that to me maybe you didnt write it right or didnt copy the full script it works just fine for me except mine is going nonstop to whicever key i press like when i press “A” it keeps going left untill i press another key but im guessing thats because there is no gravity and ground
I’m sure you figured this out already, but in case someone else see’s this.
It keeps moving because of the bit that goes
“rb.AddForce(directionOfMovement);”
This is basically like pushing a ball in space. Without any return force, it will not slow down. it just keeps going at the same speed.
it doesnt move is this supported for the current version for everything?
It worked fine for me but as said above it does almost give you a feel as if you’re on ice but i’m just guessing since I haven’t set a ground to walk on as well
why my character still sliding to one position and cant stop?
See my comment above to another comment.
It doesn’t works. My player keeps going on until another key is pressed