

Full LibGDX Game Tutorial – Game Mechanics
Welcome to part 12 of our Full LibGDX Game Tutorial. This part will focus on adding some game mechanics such as springs for jumping higher, a scoring system and DEATH. If you haven’t seen the earlier parts of this tutorial I advise you to start at Full LibGDX Game Tutorial – Project setup as this tutorial continues from these earlier parts. For those of you who have come from part 11, you can continue on.
In the last part of this tutorial we added the simplex noise generator to our game and then used it with a level generator to create levels. In this part we will start with adding a Utils class which I stole from one of my other games which has some static methods in when can be reused in other games. We will also add a mechanic to generate bouncy springs on some of our randomly generated platforms and finally and a score and death mechanic.
Game Mechanics – Adding a utility class
Firstly lets add the Utils class so we can access then in our project.
|
1 2 3 4 5 6 7 8 9 10 11 12 13 14 15 16 17 18 19 20 21 22 23 24 25 26 27 28 29 30 31 32 33 34 35 36 37 38 39 40 41 42 43 44 45 46 47 48 49 50 51 52 53 54 55 56 57 58 59 60 61 62 63 64 65 66 67 68 69 70 71 72 73 74 75 76 77 78 79 80 81 82 83 84 85 86 87 88 89 90 91 92 93 94 95 96 97 98 99 100 101 102 103 104 105 106 107 108 109 110 111 112 113 114 115 116 117 118 119 120 121 122 123 |
package blog.gamedevelopment.box2dtutorial; import com.badlogic.gdx.Gdx; import com.badlogic.gdx.files.FileHandle; import com.badlogic.gdx.graphics.Color; import com.badlogic.gdx.graphics.Pixmap; import com.badlogic.gdx.graphics.Pixmap.Format; import com.badlogic.gdx.graphics.Texture; import com.badlogic.gdx.graphics.g2d.TextureRegion; public class DFUtils { private static String[] fnames; private static String[] lnames; private static Pixmap pmap; /** * Converts HSV values to RGBA * @param hue The hue input value * @param saturation The saturation of the colour * @param value the value of the colour * @param alpha the alpha to output with RGB * @return The RGBA value */ public static Color hsvToRgba(float hue, float saturation, float value, float alpha) { int h = (int)(hue * 6); float f = hue * 6 - h; float p = value * (1 - saturation); float q = value * (1 - f * saturation); float t = value * (1 - (1 - f) * saturation); switch (h) { case 0: return new Color(value, t, p,alpha); case 1: return new Color(q, value, p,alpha); case 2: return new Color(p, value, t,alpha); case 3: return new Color(p, q, value,alpha); case 4: return new Color(t, p, value,alpha); case 5: return new Color(value, p, q,alpha); default: throw new RuntimeException("Something went wrong when converting from HSV to RGB. Input was " + hue + ", " + saturation + ", " + value); } } /** converts RGB 0-1 to hex string e.g. FFFFFF * @param r red value 0-1 * @param g green value 0-1 * @param b blue value 0-1 * @return RGB in HEX */ public static String rgbToString(float r, float g, float b) { String rs = Integer.toHexString((int)(r * 256)); String gs = Integer.toHexString((int)(g * 256)); String bs = Integer.toHexString((int)(b * 256)); return rs + gs + bs; } /** * Generates a random name using 2 text files in the assets folder * @return random name */ public static String generateRandomName(){ String name = ""; if(fnames == null){ FileHandle fnfile = Gdx.files.internal("fname.txt"); fnames = fnfile.readString().split("\n"); FileHandle lnfile = Gdx.files.internal("lname.txt"); lnames = lnfile.readString().split("\n"); } int fni = (int)(Math.random() * fnames.length); name = fnames[fni].trim(); int lni = (int)(Math.random() * lnames.length); name += "_"+lnames[lni].trim(); return name; } /** * Quick access to console logging * @param o */ public static void log(Object o){ System.out.println(o); } public static Texture makeTexture(int width, int height, String hex){ if(hex.length() == 6 ){ hex+="FF"; } return makeTexture(width,height,Color.valueOf(hex)); } public static TextureRegion makeTextureRegion(int width, int height, String hex){ if(hex.length() == 6 ){ hex+="FF"; } return makeTextureRegion(width,height,Color.valueOf(hex)); } public static TextureRegion makeTextureRegion(int width, int height, Color col){ TextureRegion tex = new TextureRegion(makeTexture(width,height,col)); return tex; } public static Texture makeTexture(int width, int height, Color col){ Texture tex; tex = new Texture(makePixMap(width,height,col)); disposePmap(); return tex; } private static Pixmap makePixMap(int width, int height, Color fill){ pmap = new Pixmap(width, height,Format.RGBA8888); pmap.setColor(fill); pmap.fill(); return pmap; } private static void disposePmap(){ pmap.dispose(); } } |
The Utils class has some useful methods such as converting HSV colour values to RGB and Creating textures at runtime. We will be using the ones that generate textures at runtime so we can create placeholders for our entity images instead of having to create nice textures. (mostly because I suck at drawing)
Game Mechanics – Adding Springs
Now we have our Utils class lets get on with the game mechanics. We want to add some springs to some of our platforms so we will update our levelFactory’s generateLevel() method so it will use an extra 2 noise values to check if a platform should have a spring on it.
|
1 2 3 4 5 6 7 8 9 10 11 12 13 14 15 16 17 18 19 20 21 22 23 24 25 26 27 28 29 30 31 |
/** Creates a pair of platforms per level up to yLevel * @param ylevel */ public void generateLevel(int ylevel){ while(ylevel > currentLevel){ // get noise sim.getNoise(xpos,ypos,zpos) 3D noise float noise1 = (float)sim.getNoise(1, currentLevel, 0); // platform 1 should exist? float noise2 = (float)sim.getNoise(1, currentLevel, 100); // if plat 1 exists where on x axis float noise3 = (float)sim.getNoise(1, currentLevel, 200); // platform 2 exists? float noise4 = (float)sim.getNoise(1, currentLevel, 300); // if 2 exists where on x axis ? float noise5 = (float)sim.getNoise(1, currentLevel ,1400); // should spring exist on p1? float noise6 = (float)sim.getNoise(1, currentLevel ,2500); // should spring exists on p2? float noise7 = (float)sim.getNoise(1, currentLevel, 2700); // should enemy exist? float noise8 = (float)sim.getNoise(1, currentLevel, 3000); // platform 1 or 2? if(noise1 > 0.2f){ createPlatform(noise2 * 25 +2 ,currentLevel * 2); if(noise5 > 0.5f){ // add bouncy platform createBouncyPlatform(noise2 * 25 +2,currentLevel * 2); } } if(noise3 > 0.2f){ createPlatform(noise4 * 25 +2, currentLevel * 2); if(noise6 > 0.4f){ // add bouncy platform createBouncyPlatform(noise4 * 25 +2,currentLevel * 2); } } currentLevel++; } } |
Here I have added noise5 and noise 6 to be the deciding factor for springs on platforms. I have also added noise 7 and 8 for future use. In the if conditionals I have added another if conditional for noise 5 and noise 6 and if the values fall in range we createBouncyPlatform(). Lets create that method now.
|
1 2 3 4 5 6 7 8 9 10 11 12 13 14 15 16 17 18 19 20 21 22 23 |
public Entity createBouncyPlatform(float x, float y){ Entity entity = engine.createEntity(); // create body component B2dBodyComponent b2dbody = engine.createComponent(B2dBodyComponent.class); b2dbody.body = bodyFactory.makeBoxPolyBody(x, y, .5f, 0.5f, BodyFactory.STONE, BodyType.StaticBody); //make it a sensor so not to impede movement bodyFactory.makeAllFixturesSensors(b2dbody.body); // give it a texture..todo get another texture and anim for springy action TextureComponent texture = engine.createComponent(TextureComponent.class); texture.region = floorTex; TypeComponent type = engine.createComponent(TypeComponent.class); type.type = TypeComponent.SPRING; b2dbody.body.setUserData(entity); entity.add(b2dbody); entity.add(texture); entity.add(type); engine.addEntity(entity); return entity; } |
This method simply adds a small cube in the middle of the platform, sets it to a sensor so it doesn’t block the players movement and sets its type to SPRING. This type setting is important as we check for this value in our collisionSystem already, and now all we need to do to react to the touching of springs is check for it in our collisionSystem and update the player.
Our collisionSystem needs to be updated to:
|
1 2 3 4 5 6 7 8 9 10 11 12 13 14 15 16 17 18 19 20 21 22 23 24 25 26 27 28 29 30 31 32 33 34 35 36 37 38 |
@Override protected void processEntity(Entity entity, float deltaTime) { // get player collision component CollisionComponent cc = cm.get(entity); Entity collidedEntity = cc.collisionEntity; if(collidedEntity != null){ TypeComponent type = collidedEntity.getComponent(TypeComponent.class); if(type != null){ switch(type.type){ case TypeComponent.ENEMY: //do player hit enemy thing System.out.println("player hit enemy"); pm.get(entity).isDead = true; break; case TypeComponent.SCENERY: //do player hit scenery thing pm.get(entity).onPlatform = true; System.out.println("player hit scenery"); break; case TypeComponent.SPRING: //do player hit other thing pm.get(entity).onSpring = true; System.out.println("player hit spring: bounce up"); break; case TypeComponent.OTHER: //do player hit other thing System.out.println("player hit other"); break; default: System.out.println("No matching type found"); } cc.collisionEntity = null; // collision handled reset component }else{ System.out.println("type == null"); } } } |
In the collisionSystem we check if the player has hit a spring and if they have, we set the player onSpring to true. The last thing to do to get the player to jump from a spring is to actually make the player jump. This is done in the playerControlSystem with a simple if conditional.
|
1 2 3 4 5 6 |
// make player jump very high if(player.onSpring){ b2body.body.applyLinearImpulse(0, 175f, b2body.body.getWorldCenter().x,b2body.body.getWorldCenter().y, true); state.set(StateComponent.STATE_JUMPING); player.onSpring = false; } |
Here we have added a force to the player to make the go upwards and set their state to jumping so the player can’t jump again. We then reset the onSpring flag so the player isn’t continuously getting shot upwards.
Game Mechanics – Increasing Water and DEATH.
Now let’s add the death mechanic. The player will die instantly the moment they are touched by the water coming from the bottom of the world. To do that we first need to add the water and the first part of that is to make the waterFloorComponent.
|
1 2 3 4 5 6 7 |
package blog.gamedevelopment.box2dtutorial.entity.components; import com.badlogic.ashley.core.Component; public class WaterFloorComponent implements Component{ // component to identify water floor } |
This component is simply here to identify the water. The next thing we need to do is to make a system that moves this water upwards at an ever increasing speed and that system is this:
|
1 2 3 4 5 6 7 8 9 10 11 12 13 14 15 16 17 18 19 20 21 22 23 24 25 26 27 28 29 30 31 32 33 34 35 |
package blog.gamedevelopment.box2dtutorial.entity.systems; import blog.gamedevelopment.box2dtutorial.entity.components.B2dBodyComponent; import blog.gamedevelopment.box2dtutorial.entity.components.WaterFloorComponent; import com.badlogic.ashley.core.ComponentMapper; import com.badlogic.ashley.core.Entity; import com.badlogic.ashley.core.Family; import com.badlogic.ashley.systems.IteratingSystem; import com.badlogic.gdx.physics.box2d.Body; public class WaterFloorSystem extends IteratingSystem { private Entity player; private ComponentMapper<B2dBodyComponent> bm = ComponentMapper.getFor(B2dBodyComponent.class); public WaterFloorSystem(Entity player) { super(Family.all(WaterFloorComponent.class).get()); this.player = player; } @Override protected void processEntity(Entity entity, float deltaTime) { // get current y level of player entity float currentyLevel = player.getComponent(B2dBodyComponent.class).body.getPosition().y; // get the body component of the wall we're updating Body bod = bm.get(entity).body; float speed = (currentyLevel / 300); speed = speed>1?1:speed; bod.setTransform(bod.getPosition().x, bod.getPosition().y+speed, bod.getAngle()); } } |
We also need to add this to our engine like all other systems in our MainScreen class:
|
1 2 3 4 5 6 7 8 9 10 11 12 |
engine.addSystem(new AnimationSystem()); engine.addSystem(new PhysicsSystem(lvlFactory.world)); engine.addSystem(renderingSystem); engine.addSystem(new PhysicsDebugSystem(lvlFactory.world, renderingSystem.getCamera())); engine.addSystem(new CollisionSystem()); engine.addSystem(new PlayerControlSystem(controller)); player = lvlFactory.createPlayer(atlas.findRegion("player"),cam); engine.addSystem(new WallSystem(player)); engine.addSystem(new WaterFloorSystem(player)); // takes the player as an argument engine.addSystem(new LevelGenerationSystem(lvlFactory)); |
Here we have added the WaterFloorSystem and added the player as an argument. This is because we want to increase the speed of the water the higher the player gets so the game becomes more difficult the higher you get.
The waterFloorSystem can now control the increasing water but we haven’t created the water yet. We need to ad a method to our LevelFactory that creates and entity that can be moved and that method is:
|
1 2 3 4 5 6 7 8 9 10 11 12 13 14 15 16 17 18 19 20 21 22 23 24 25 26 27 28 |
/** * Creates the water entity that steadily moves upwards towards player * @return */ public Entity createWaterFloor(TextureRegion tex){ Entity entity = engine.createEntity(); B2dBodyComponent b2dbody = engine.createComponent(B2dBodyComponent.class); TransformComponent position = engine.createComponent(TransformComponent.class); TextureComponent texture = engine.createComponent(TextureComponent.class); TypeComponent type = engine.createComponent(TypeComponent.class); WaterFloorComponent waterFloor = engine.createComponent(WaterFloorComponent.class); type.type = TypeComponent.ENEMY; texture.region = tex; b2dbody.body = bodyFactory.makeBoxPolyBody(20,-15,40,10, BodyFactory.STONE, BodyType.KinematicBody,true); position.position.set(20,-15,0); entity.add(b2dbody); entity.add(position); entity.add(texture); entity.add(type); entity.add(waterFloor); b2dbody.body.setUserData(entity); engine.addEntity(entity); return entity; } |
Things to note about this is that we make the waterFloor a KinematicBody. This is a box2d body type that says this block will be moved using code and should not be effected by gravity. We also set the type to ENEMY so that if our player hits this they will be killed.
All that’s left to do is to add a call to this method to create the water floor and we will do that the same place we create the normal floor in our MainScreen method. Update your MainScreen code to this:
|
1 2 3 4 5 6 7 8 9 10 11 12 13 14 15 16 17 18 19 20 21 22 23 24 25 26 27 28 29 30 31 32 33 34 35 36 37 38 39 40 41 42 43 44 45 46 |
/** * @param box2dTutorial */ public MainScreen(Box2DTutorial box2dTutorial) { parent = box2dTutorial; parent.assMan.queueAddSounds(); parent.assMan.manager.finishLoading(); atlas = parent.assMan.manager.get("images/game.atlas", TextureAtlas.class); ping = parent.assMan.manager.get("sounds/ping.wav",Sound.class); boing = parent.assMan.manager.get("sounds/boing.wav",Sound.class); controller = new KeyboardController(); engine = new PooledEngine(); lvlFactory = new LevelFactory(engine,atlas.findRegion("player")); sb = new SpriteBatch(); RenderingSystem renderingSystem = new RenderingSystem(sb); cam = renderingSystem.getCamera(); sb.setProjectionMatrix(cam.combined); engine.addSystem(new AnimationSystem()); engine.addSystem(new PhysicsSystem(lvlFactory.world)); engine.addSystem(renderingSystem); engine.addSystem(new PhysicsDebugSystem(lvlFactory.world, renderingSystem.getCamera())); engine.addSystem(new CollisionSystem()); engine.addSystem(new PlayerControlSystem(controller)); player = lvlFactory.createPlayer(atlas.findRegion("player"),cam); engine.addSystem(new WallSystem(player)); engine.addSystem(new WaterFloorSystem(player)); engine.addSystem(new LevelGenerationSystem(lvlFactory)); int floorWidth = (int) (40*RenderingSystem.PPM); int floorHeight = (int) (1*RenderingSystem.PPM); TextureRegion floorRegion = DFUtils.makeTextureRegion(floorWidth, floorHeight, "11331180"); lvlFactory.createFloor(floorRegion); int wFloorWidth = (int) (40*RenderingSystem.PPM); int wFloorHeight = (int) (10*RenderingSystem.PPM); TextureRegion wFloorRegion = DFUtils.makeTextureRegion(wFloorWidth, wFloorHeight, "11113380"); lvlFactory.createWaterFloor(wFloorRegion); int wallWidth = (int) (1*RenderingSystem.PPM); int wallHeight = (int) (60*RenderingSystem.PPM); TextureRegion wallRegion = DFUtils.makeTextureRegion(wallWidth, wallHeight, "222222FF"); lvlFactory.createWalls(wallRegion); } |
Here you can see we started using the DFUtils class to make some images using some HEX values instead of creating images and loading them in. You will also notice we use the PPM constant form the RenderingSystem. You will have to make this field public in the RenderingSystem class so we can access it in the above code.
Currently all that happens here is that when the player hits the water it writes “player hit enemy” and we want it to actually make the player dead. To do that we need to add a field in the player component. A simple boolean isDead = false will do. Once you have added that we can updated our CollisionSystem to flip this to true if the player hits an enemy with this code:
|
1 2 3 4 5 6 7 8 |
case TypeComponent.ENEMY: //do player hit enemy thing System.out.println("player hit enemy"); PlayerComponent pl = pm.get(entity); pl.isDead = true; int score = (int) pl.cam.position.y; System.out.println("Score = "+ score); break; |
In this code we have flipped the isDead flag for the player so they become dead and as a bonus we also added some code to print out the score which is derived from the height the player got to before they died.
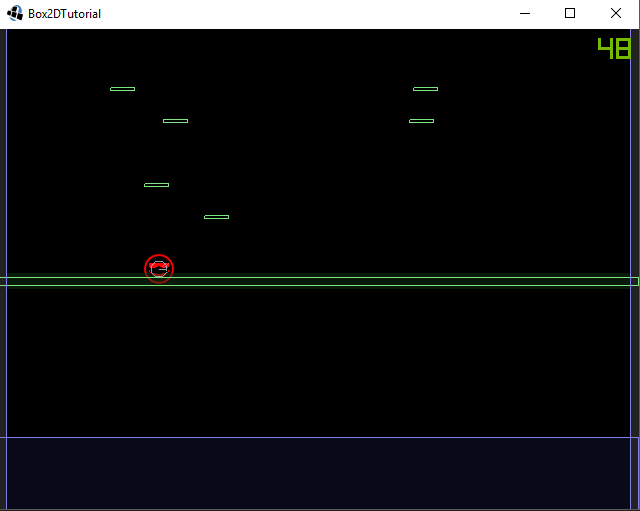
Once you are finished you should end up with something similar to this when you start your application:
As usual the complete code up to this part is available from StorMyVids. The next part, Part 13 will go over the enemy system and how to add them to our game.
If you find mistakes with this article or have some improvements please leave a comment below
| ← Simplex Noise and Level Gen | — Contents — | Ashley Enemy System → |
Thanks for your work, the part 13? 🙂
Part 13 is about the adding enemies. I have updated the post with the link to the next part.
Thank you very much, John.
Hmm, everything is pretty much working for me. Except the player when jumping is SUPER jittery.
For some reason also, your jumping code for player movement is set to 75, for me that is way too high. Is it our screen size/resolution differences that account for that? Same with the spring code.
Also. For some reason the Player Character can continue to jump after they have started falling. I’m not sure if that is intentional or not? I’ve gone over both the code I wrote following this, and the code you provide. I am sure I’ve dotted all my i’s and crossed my t’s, but I imagine others aren’t having the same problem I am, otherwise I think I’d see more comments.
Not sure what’s going on.
Ah I figured out why the jumping code was 75 and spring 175, I had changed my STONE attributes.
It’s just the jittering I can’t get rid of now. Before the Ashley ECS everything ran pretty smooth. I’m liking components though, I am thinking up some cool uses for them.
jittering could be caused by low FPS. What sort of FPS are you getting when you run the app?
Uh, not sure what FPS I get, but this is using the GPU isn’t it? I have a quad core hyperthreaded 4770k, and a 4GB Nvidia GPU.
So the computer isn’t the problem. I’m still going through the code again to see if I made a mistake. How would I go about getting a FPS count anyway? Is that fraps you were using in the picture? It works with this?
Also I was wondering. Can Ashley be used to create background systems, like for a crafting system with components, for building modular weapons, or setting up attributes and skill systems, and then attach them to Scene2D’s actors/actions/stage?
I use Nvidia’s GeForce Experience to show FPS.
As for Ashley, you can use it however you see fit. The component-system does fit well with a modular item system.
Might be a bit late, but I noticed I had the gittering too. For me the solution was to change the order of adding systems to the engine.
engine.addSystem(new AnimationSystem());
engine.addSystem(new CollisionSystem());
engine.addSystem(new PhysicsSystem(lvlFactory.world));
engine.addSystem(new PhysicsDebugSystem(lvlFactory.world, renderingSystem.getCamera()));
engine.addSystem(new PlayerControlSystem(controller));
engine.addSystem(renderingSystem);
I’m not sure if the framework is “ordered” like this, but I would think that rendering should happen after all other systems did their thing.
Hope this helps.
Building on JohannisK reply, the issue is that the PlayerControlSystem comes after the renderSystem. Using the renderSystem at the end makes it so that the enemies are not removed when hit, instead it takes a few frames.
What I have:
engine.addSystem(new AnimationSystem());
engine.addSystem(new PhysicsSystem(lvlFactory.world));
engine.addSystem(new PlayerControlSystem(controller, lvlFactory));
There somewhere I can send you a video of what it;s doing?
You could put it on youtube and post the link here
How can we add images to the floors?
//player = lvlFactory.createPlayer(atlas.findRegion(“player”),cam);
//engine.addSystem(new WallSystem(player));
//engine.addSystem(new WaterFloorSystem(player));
lvlFactory.createWalls(wallRegion);
el player lo declaro de que tipo?
de donde sale la clase wallSystem? me sale error
el metodo createWalls?
Hi my game doesn’t work when i add the water, i think there something wrong into createWaterFloor method, and i don’t know what put into createWalls method, also i visited your github for have some answer, but the levelfactory class is missing, please i need help, answer me as soon as you can.
Best regard Stefano