Full Unity 2D Game Tutorial 2019 – Firing Bullets
In this section of the tutorial we will look into creating prefabs (prefabricated objects) in order to fire bullets from our player.
Full Unity 2D Game Tutorial 2019 – Creating The Bullet
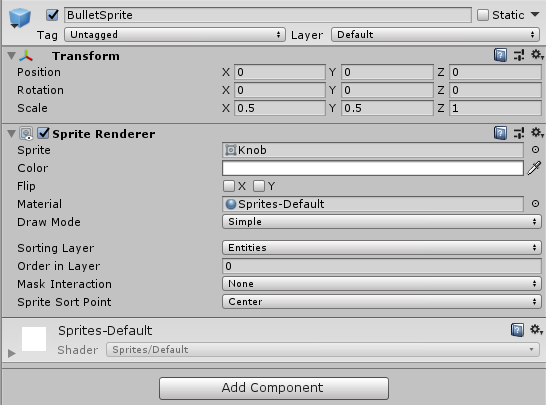
Create an empty to hold all our bullet parts and name it BulletObject. Add a sprite and set the sprite image to the Knob image again. This time we will set the transform scale for the sprite image to 0.5, 0.5, 1. The image should appear half the size of our player. Now we get to use the sorting layer we created earlier in the tutorial. Set the sorting layer to entities.
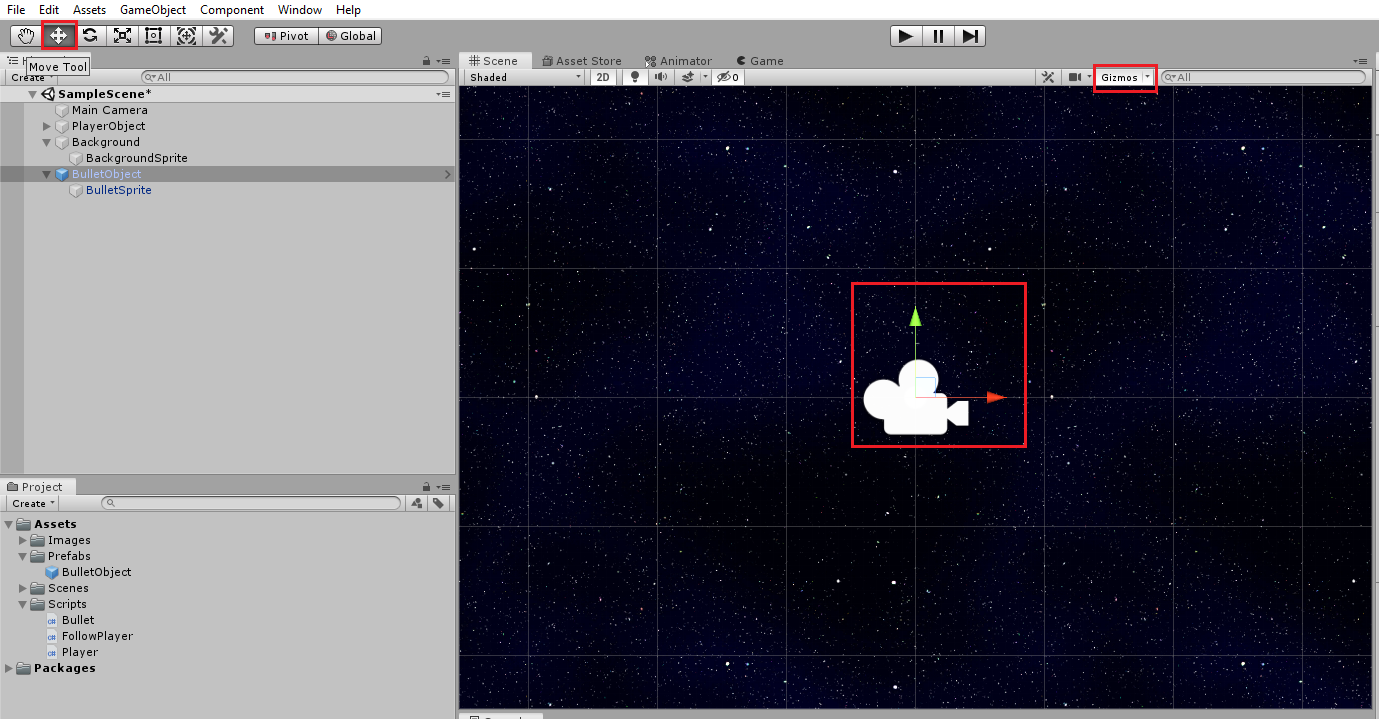
If you can’t see the bullet on the screen make sure the BulletObject and sprite transforms are both set with the z position to zero. Then use the move tool to move the BulletObject to the left. You can also disable the Camera icon and other gizmo icons with the gizmo toggle highlighted in the image below.
The bullet will be using physics so lets add a RigidBody2D to the BulletObject and set the gravity to zero and the Interpolate to Interpolate. Let’s get into the coding.
Full Unity 2D Game Tutorial 2019 – Bullet Code
On the BulletObject add a component and create a new script called Bullet and add the following code:
|
1 2 3 4 5 6 7 8 9 10 11 12 13 14 15 16 17 18 19 20 21 22 23 24 25 |
public class Bullet: MonoBehaviour { public int speed = 50; // The speed our bullet travels public Vector3 targetVector; // the direction it travels public float lifetime = 10f; // how long it lives before destroying itself public float damage = 10; // how much damage this projectile causes void Start() { // find our RigidBody Rigidbody2D rb = gameObject.GetComponentInChildren<Rigidbody2D>(); // add force rb.AddForce(targetVector.normalized * speed); } // Update is called once per frame void Update() { // decrease our life timer lifetime -= Time.deltaTime; if (lifetime <= 0f) { // we have ran out of life Destroy(gameObject); // kill me } } } |
In this section of code we added some public variables; speed, targetVector, lifetime and damage. These are the data we will need in order to move the bullet and eventually damage enemies. Again in the start we find our RigidBody2D except this time we don’t store it because once we add force to it we never use it again. Finally we have an Update method which decreases lifetime until it fallse below zero and then uses the built in Unity function Destroy to destroy the BulletObject. We need to destroy them or eventually we will have millions of bullets lagging up the game.
You should now have a BulletObject with components like the image below:
Full Unity 2D Game Tutorial 2019 – Creating a prefab
A prefab is a pre-fabricated object. It is basically as object you have already created with all its settings set, and then saved in the project assets folder for you to use again later. Bullets which we will be creating a lot of, is an ideal object to turn into a prefab. First create a folder called Prefabs. Then simple drag the BulletObject from the hierarchy view into the prefabs folder. Done! you now have a prefab which can be used to make many bullets.
Okay, let’s update our player so that they shoot when we press space. This isn’t what we aim to have in our finished product but we want some way to test the bullets first.
|
1 2 3 4 5 6 7 8 9 10 11 12 13 14 15 16 17 18 19 |
public class Player : MonoBehaviour { public float moveSpeed = 5f; public float hitPoints = 100f; private Rigidbody2D rb; public GameObject bulletPrefab; // the prefab of our bullet // Update is called once per frame void Update(){ if (Input.GetKeyDown(KeyCode.Space)) { // if the player pressed space (exclude holding key down) GameObject go = Instantiate(bulletPrefab, gameObject.transform); Bullet bullet = go.GetComponent<Bullet>(); bullet.targetVector = new Vector3(1,1,0); } } //... more code |
Code Notes:
We added a public GameObject bulletPrefab to store our prefab in, we will need to add this is the inspector by dragging the prefab from our prefab folder to the input box on our PlayerObject
We have used Input.GetKeyDown to check if the player pressed space. This only fires the once per key press. If we used GetKey we would fire every frame while the space bar is pressed down.
Instantiate is used to create a new GameObject in the world. We pass it the bullet prefab(the object to create) and the PlayerObject’s transform(the place to create it).
Now if we save everything and press play in Unity we should be able to fire a bullet once per key press. If the bullet is appearing from an odd position(maybe to the left of the player) This is because we moved the BulletObject to see it in our scene view.
Full Unity 2D Game Tutorial 2019 – Editing A Prefab
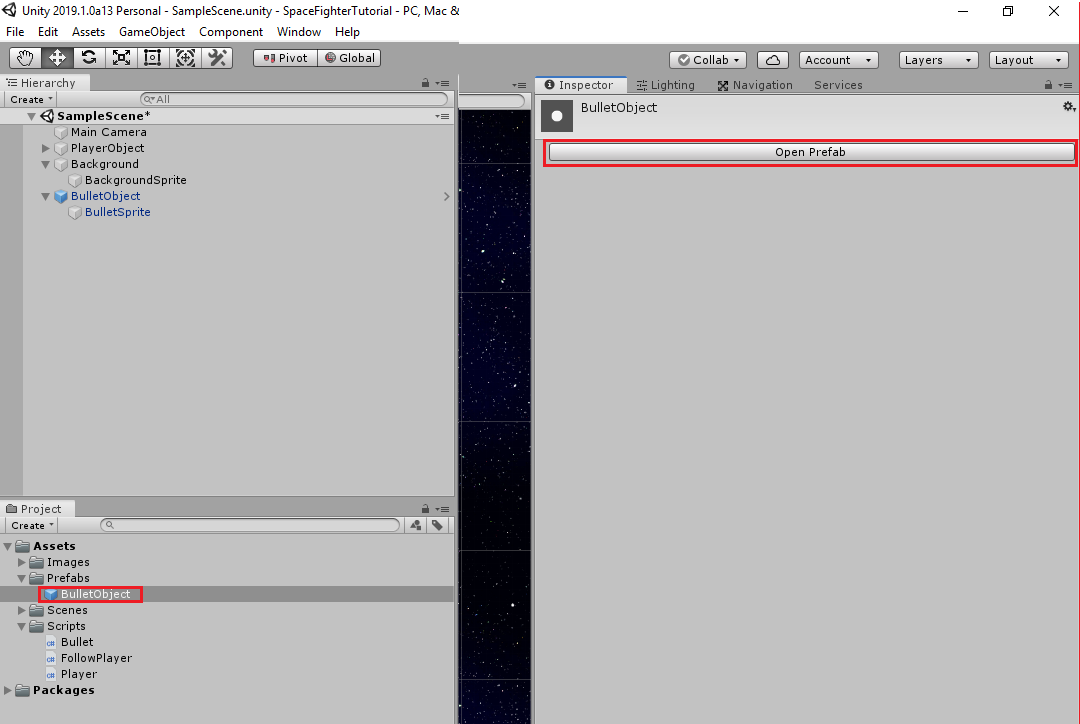
Open up the bullet prefab by selecting it in our project window and selecting Open Prefab in the Inspector window.
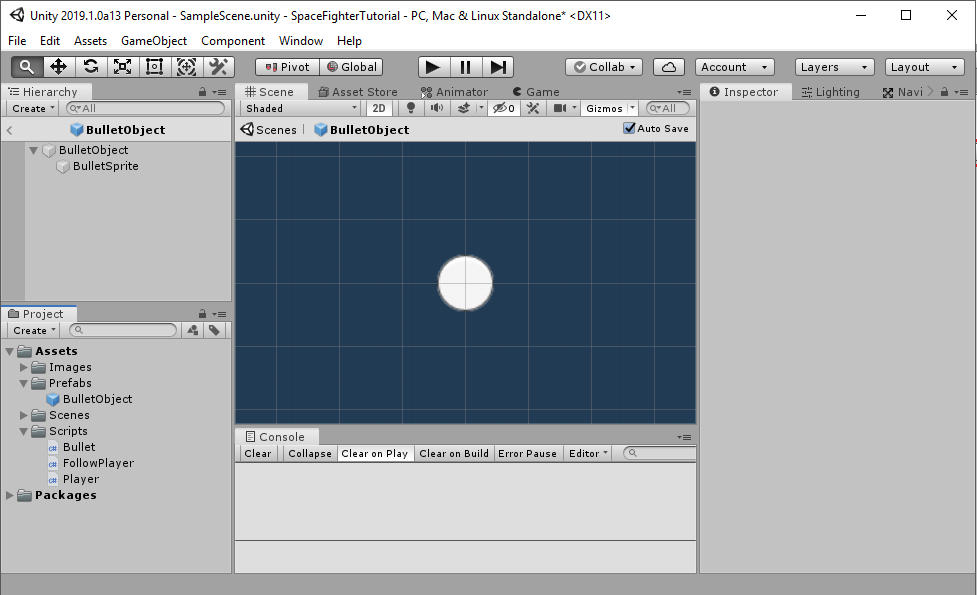
This will open the prefab by itself. Now we can change the BulletObject’s transform position to 0, 0, 0. Do the same for the BulletSprite just in case. The values save automatically and we can return out of the prefab by clicking the < in the hierarchy view. 
Now when you press play and hit the space bar bullets should fly(slowly) up to the right of the screen. If you are wondering why my Unity is coloured red its because any settings changed while the game is playing is only for that one play. Any changed will be discarded, and I often do this. So the settings allow you to change the colour of Unity during play mode and this is mine. Red for oh noes!
That’s it for this tutorial section. The Github source for the completed project can be found here on Github.
Part 3 Background and Camera – Part 5 – Simple AI and Colliders


A bit late to this tutorial, but everything has been working until this part. When I press space to fire the bullet, it renders as expected, but then it does not move and I get this error:
NullReferenceException: Object reference not set to an instance of an object
Player.Update () (at Assets/Scripts/Player.cs:26)
Line 26 is: bullet.targetVector = new Vector3(1,1,0);
I triple checked my steps and even compared my code to the code in the Github. Everything appears to match. And yes, I did drag the “BulletObject” prefab into the “Bullet Prefab” field in the inspector under “PlayerObject”
If I’m not mistaken, this error is saying that I am trying to reference a “bullet” object that does not exist. But I thought that’s what lines 24 and 25 were for, which instantiate and construct the object:
GameObject go = Instantiate(bulletPrefab, gameObject.transform);
Bullet bullet = go.GetComponent();
Any ideas or assistance welcome and appreciated, thank you!
Sorry, in the above post, line 25 is not posting correctly because the seem to be parsing as HTML. Should be Bullet bullet = go.GetComponent(<Bullet>);
Sigh… one last try. Line 25 is: Bullet bullet = go.GetComponent<Bullet>();
Update:
I fixed my own issue, it had nothing to do with the code, but rather how I added components to the bullet prefab. I noticed in the screenshots my “Rigidbody 2D” and “Bullet (Script)” components were not in the same order as the author’s. When I tried re-arranging them, I got a message about how I could not restructure the prefab instance because “Children of a Prefab instance cannot be deleted or moved, and components cannot be reordered.”
When I opened the Bullet Prefab for editing, I noticed my “Rigidbody 2D” and “Bullet (Script)” components were now missing. So I exited editing the prefab and went back to the scene. I removed the two components from the inspector. Then re-opened the Prefab for editing and re-added the two components from this Prefab editor screen this time, in the order of Script and then Rigidbody 2D. Exit back to the scene, save, test, it worked!
Very strange that adding the Prefab components didn’t “take”. Maybe it’s because I added the components first, then made the BulletObject a Prefab? I guess I should have done those the other way around but I thought I was following the order of the tutorial? /shrug
Thank you! Nice tutorial. Maybe you should mention that the “BulletObject” has to be assigned to the “Player”-Script in the PlayerObject (in the Inspector-Window) as you added a new varaible (bulletPrefab) to the Script. Otherwise you get an Null-Exception because there is no object assigned.
A screenshot of the state of the PlayerObject in the Inspector after editing the “Player”-script should be enough for people to get this.