
Full LibGDX Game Tutorial – Clean Up
Welcome to part 18 of our Full LibGDX Game Tutorial. This part will focus on Tidying up our current code, fixing some bugs and replacing all our temporary images with more polished images. In general we will clean up our code. We will also look into adding some sounds. If you haven’t seen the earlier parts of this tutorial I advise you to start at Full LibGDX Game Tutorial – Project setup as this tutorial continues from these earlier parts. For those of you who have come from part 17, you can continue on.
The first thing we’re going to do is we’re going to fix a bug that has been plaguing our application for a while. The bug is that particle effects would only work for the first iteration of the game and any subsequent games would only show the textures. I believe the problem was due to how we were using the main screen. We were creating a game with the main screen and then after our player died we just created a new main screen to start a new world. This usually wouldn’t be an issue, but, as we were using pooling in both our Ashley ECS engine and our particle effect manager the recreation of the screen somehow stopped our particles from being rendered.

In light of this issue a new approach has been implemented and as an added bonus it is more efficient with memory as it no longer creates new screens for each death. Instead we use the same screen and we just reset all the variables that define the level progress. Update your Box2dTutorial class so the changeScreen method now looks like this:
|
1 2 3 4 5 6 7 8 9 10 11 12 13 14 15 16 17 18 19 20 21 22 23 24 25 26 |
public void changeScreen(int screen){ switch(screen){ case MENU: if(menuScreen == null) menuScreen = new MenuScreen(this); this.setScreen(menuScreen); break; case PREFERENCES: if(preferencesScreen == null) preferencesScreen = new PreferencesScreen(this); this.setScreen(preferencesScreen); break; case APPLICATION: // always make new game screen so game can't start midway if(mainScreen == null){ mainScreen = new MainScreen(this); }else{ mainScreen.resetWorld(); } this.setScreen(mainScreen); break; case ENDGAME: if(endScreen == null) endScreen = new EndScreen(this); this.setScreen(endScreen); break; } } |
Here we have just made it so the mainScreen is created once then any subsequent screenChanges will use the same mainScreen and call the new method resetWorld() which as you’ve probably guessed resets the world variables.
We need to add this resetWorld() method to our level factory and our mainScreen. So in our mainScreen we add this method:
|
1 2 3 4 5 6 7 8 9 10 11 12 13 14 15 16 17 18 19 20 21 22 23 24 |
// reset world or start world again public void resetWorld(){ System.out.println("Resetting world"); engine.removeAllEntities(); lvlFactory.resetWorld(); player = lvlFactory.createPlayer(cam); lvlFactory.createFloor(); lvlFactory.createWaterFloor(); int wallWidth = (int) (1*RenderingSystem.PPM); int wallHeight = (int) (60*RenderingSystem.PPM); TextureRegion wallRegion = DFUtils.makeTextureRegion(wallWidth, wallHeight, "222222FF"); lvlFactory.createWalls(wallRegion); //TODO make some damn images for this stuff // reset controller controls (fixes bug where controller stuck on direction if died in that position) controller.left = false; controller.right = false; controller.up = false; controller.down = false; controller.isMouse1Down = false; controller.isMouse2Down = false; controller.isMouse3Down = false; } |
This empties our Ashley engine of all the entities and then recreates certain required entities such as walls and the player. We also set the controller values back to the default false state as it would sometimes stick in the true position if your character died when pressing a key. Now we update your levelFactory with it’s own resetWorld() method so it can create a new seed for our simplex noise level generation and remove all the Box2D bodies from the Box2D world.
|
1 2 3 4 5 6 7 8 9 |
public void resetWorld() { currentLevel = 0; openSim = new OpenSimplexNoise(MathUtils.random(2000l)); Array<Body> bods = new Array<Body>(); world.getBodies(bods); for(Body bod:bods){ world.destroyBody(bod); } } |
Since we are now recreating the player each turn we can no longer pass the player entity to the Systems we have in the MainScreen. We now have to pass the LevelFactory which will contain the player entity each time a player is created. So let’s update our MainScreen with the new constructor:
|
1 2 3 4 5 6 7 8 9 10 11 12 13 14 15 16 17 18 19 20 21 22 23 24 25 26 27 28 29 30 31 32 33 34 35 36 37 38 39 40 41 42 43 44 |
public MainScreen(Box2DTutorial box2dTutorial) { parent = box2dTutorial; //parent.assMan.queueAddSounds(); //parent.assMan.manager.finishLoading(); //ping = parent.assMan.manager.get("sounds/ping.wav",Sound.class); //boing = parent.assMan.manager.get("sounds/boing.wav",Sound.class); controller = new KeyboardController(); engine = new PooledEngine(); // next guide - changed this to atlas lvlFactory = new LevelFactory(engine,parent.assMan); sb = new SpriteBatch(); RenderingSystem renderingSystem = new RenderingSystem(sb); cam = renderingSystem.getCamera(); ParticleEffectSystem particleSystem = new ParticleEffectSystem(sb,cam); sb.setProjectionMatrix(cam.combined); engine.addSystem(new AnimationSystem()); engine.addSystem(new PhysicsSystem(lvlFactory.world)); engine.addSystem(renderingSystem); // not a fan of splitting batch into rendering and particles but I like the separation of the systems engine.addSystem(particleSystem); // particle get drawns on top so should be placed after normal rendering engine.addSystem(new PhysicsDebugSystem(lvlFactory.world, renderingSystem.getCamera())); engine.addSystem(new CollisionSystem()); engine.addSystem(new SteeringSystem()); engine.addSystem(new PlayerControlSystem(controller,lvlFactory)); player = lvlFactory.createPlayer(cam); engine.addSystem(new EnemySystem(lvlFactory)); engine.addSystem(new WallSystem(lvlFactory)); engine.addSystem(new WaterFloorSystem(lvlFactory)); engine.addSystem(new BulletSystem(lvlFactory)); engine.addSystem(new LevelGenerationSystem(lvlFactory)); lvlFactory.createFloor(); lvlFactory.createWaterFloor(); //lvlFactory.createSeeker(Mapper.sCom.get(player),20,15); int wallWidth = (int) (1*RenderingSystem.PPM); int wallHeight = (int) (60*RenderingSystem.PPM); TextureRegion wallRegion = DFUtils.makeTextureRegion(wallWidth, wallHeight, "222222FF"); lvlFactory.createWalls(wallRegion); //TODO make some damn images for this stuff } |
You will notice Errors for systems like the BulletSystem. To fix this we simple change the BulletSystem constructor like this:
|
1 2 3 4 5 6 7 |
private LevelFactory lvlFactory; @SuppressWarnings("unchecked") public BulletSystem(LevelFactory lvlFactory){ super(Family.all(BulletComponent.class).get()); this.lvlFactory = lvlFactory; } |
Then anywhere we used player we now use levelFactory.player:
|
1 2 |
B2dBodyComponent playerBodyComp = Mapper.b2dCom.get(player); //old B2dBodyComponent playerBodyComp = Mapper.b2dCom.get(lvlFactory.player); //new |
This also needs done for the EnemySystem, WallSystem and WaterFloorSystem.
You should now be able to play the game with particle effects working continuously even after a players death.
Clean up the Sleeping Player Bug.
A bug in our code that allows the player to survive underwater exists. After some investigation it was found to be the body sleeping. When a Box2d body is stationary for a period of time it will go to sleep to reduce the amount of processing needed. This is good in most cases but in our case we would miss the contact event of the water hitting the player. So, how to we avoid this? well we simple stop the player from sleeping which is done when we create the player.
In our createPlayer method in the LevelFactory add this line to allow force the player to stay awake:
|
1 |
b2dbody.body.setSleepingAllowed(false); // don't allow unit to sleep or it will sleep through events if stationary too long |
Clean up the Texture System.
In our current Rendering system we have a texture component which allows us to set a texture to our entities. This works as expected when we use an image the same size as our entity but what if we had an image that we want the top to extrude a bit from our entity. Currently we don’t support this as the image center will always be the entity center. In order to allow this we need to add an x and y offset value. So let’s add that now. In your TextureComponent add an x and y offset float:
|
1 2 3 4 5 6 7 8 9 10 |
public class TextureComponent implements Component, Poolable { public TextureRegion region = null; public float offsetX = 0; public float offsetY = 0; @Override public void reset() { region = null; } } |
Great we have our offsets but we need to make our renderer use these new values. All we need to do is update the line that draws the image and add the offsets:
|
1 2 3 4 5 6 7 |
batch.draw(tex.region, t.position.x - originX + tex.offsetX, t.position.y - originY + tex.offsetY, originX, originY, width, height, PixelsToMeters(t.scale.x), PixelsToMeters(t.scale.y), t.rotation); |
That’s it we can now set textures to entities with offsets and it will affect animations. We will use this later.
Clean up miscellaneous resources.
We’ve fixed the issue with the disappearing particles and added offsets to our textures, now we want to improve the current images and animations. I have created some new assets and packed them with the texture packer. You can download all the images, sounds, and particle effects here Assets.zip. This is the whole assets folder with all the files that will be used for this application.
Now you have the files ready to use we can start updating our code. The first thing we’re going to do is to update the LevelFactory. We need to change the scale of our water particle effect as it has changed in the new assets.
|
1 2 3 4 5 |
// change this pem.addParticleEffect(ParticleEffectManager.WATER, assMan.manager.get("particles/water.pe",ParticleEffect.class),1f/8f); // to this pem.addParticleEffect(ParticleEffectManager.WATER, assMan.manager.get("particles/water.pe",ParticleEffect.class),1f/16f); |
We also need to change the position of the new water particle effect:
|
1 2 |
makeParticleEffect(ParticleEffectManager.WATER, b2dbody,-15,22); //old makeParticleEffect(ParticleEffectManager.WATER, b2dbody,-19,14); //new |
We changed the particle effect to the new one, now lets change the waterFloorMethod to allow for the new animation. This is just a copy paste from our bullet method with a few things changed to match our water floor properties.
|
1 2 3 4 5 6 7 8 9 10 11 12 13 14 15 16 17 18 19 20 21 22 |
TextureComponent texture = engine.createComponent(TextureComponent.class); TypeComponent type = engine.createComponent(TypeComponent.class); WaterFloorComponent waterFloor = engine.createComponent(WaterFloorComponent.class); AnimationComponent animCom = engine.createComponent(AnimationComponent.class); StateComponent stateCom = engine.createComponent(StateComponent.class); Animation anim = new Animation(0.3f,atlas.findRegions("water")); anim.setPlayMode(Animation.PlayMode.LOOP); animCom.animations.put(0, anim); type.type = TypeComponent.ENEMY; texture.region = waterTex; texture.offsetY = 1; b2dbody.body = bodyFactory.makeBoxPolyBody(20,-40,40,44, BodyFactory.STONE, BodyType.KinematicBody,true); position.position.set(20,-15,0); entity.add(b2dbody); entity.add(position); entity.add(texture); entity.add(animCom); entity.add(stateCom); entity.add(type); entity.add(waterFloor); |
while we’re here we should do that same for the bouncy platforms as they now have an animation.
|
1 2 3 4 5 6 7 8 9 10 11 12 |
AnimationComponent animCom = engine.createComponent(AnimationComponent.class); StateComponent stateCom = engine.createComponent(StateComponent.class); Animation anim = new Animation(0.03f,atlas.findRegions("pad")); anim.setPlayMode(Animation.PlayMode.LOOP); animCom.animations.put(StateComponent.STATE_NORMAL, anim); stateCom.set(StateComponent.STATE_NORMAL); b2dbody.body.setUserData(entity); entity.add(animCom); entity.add(stateCom); entity.add(b2dbody); entity.add(texture); |
All we have done here is add animations to the water floor and bouncy platform.
Clean up the Minor problems.
The player animation is centered on the player but we want the bottom of the animation to match the bottom of the player as currently it looks like the player is sinking in the ground. To fix this we simple use our new offsets in the textureComponent.
|
1 |
texture.offsetY = 0.5f; adjust player texture position |
Again the floor texture is out from the box2d body. We will fix that with the offset values as well:
|
1 |
texture.offsetY = -0.4f; |
Our seeker enemy has a new image and needs updated by simple changing the name of the texture to load:
|
1 2 |
texture.region = atlas.findRegion("player"); // old texture.region = atlas.findRegion("enemy"); // new |
New values for our steering behavior.
|
1 2 3 |
.setWanderOffset(5f) // distance away from entity to set target .setWanderOrientation(180f) // the initial orientation .setWanderRate(MathUtils.PI2 * 4); // higher values = more spinning |
Since our seeker image is no longer a circle and it now looks odd when its upside down we need to change the default independant facing value of our steeringBehaviour. The independant facing boolean toggles whether the box2d body has to look in the same direction as it is going. If it is independantfacing it can look in one direction and travel in another. If the independant facing is off then the unit must be rotated so it faces the direction it is traveling in. We don’t want this so we change our default facing to true in our steeringComponent:
|
1 |
private boolean independentFacing = true; |
I have also adjusted the enemy speed from 2f to 1.5f to make them slower. You don’t have to do this but it you want to you can change it like this:
|
1 |
float maxLinearSpeed = 1.5f; |
The final minor change is to set the background colour to light blue to appear the same colour as the sky. This is done in the MainScreen class in the render method:
|
1 |
Gdx.gl.glClearColor(0.4f, 0.4f, 0.8f, 1); |
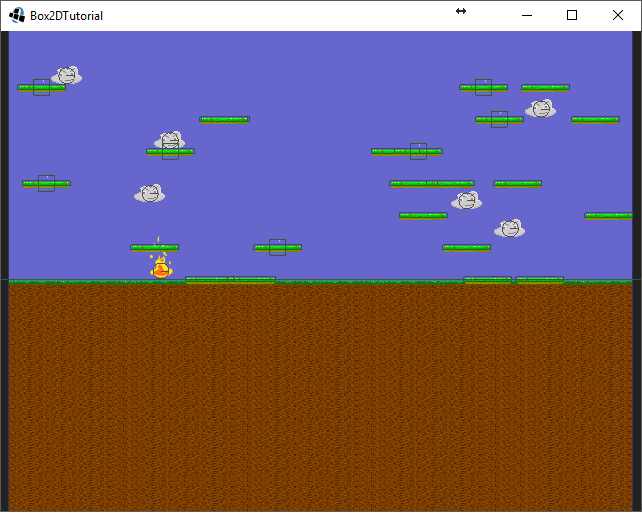
This is the current stage of the game if you’ve followed the all the previous tutorial steps.
[embedyt] https://www.youtube.com/watch?v=YVjOslesH6Q[/embedyt]
In the next part of the tutorial we will cover sounds and music. The finished source code for this part can be found on github at this link https://github.com/dfour/box2dtut/tree/part18
If you think you have something to add to this tutorial or any questions about it feel free to add a comment below.
Hello
Is there any way to change the MainScreen Resolution? i tried running the game on a android emulator and the MainScreen resolution is so big the game is unplayable. i tried changing the PreferencesScreen’s resolution and i manged to fix it.
Thank you so much for the Tutorials.