Full Unity 2D Game Tutorial 2019 – Audio Manager
Sounds and music are an important part of a game that can help emphasise the theme of your game and take it to a higher level. In this part of the tutorial we will be adding an Audio Manager which will control what sounds will play and loop through the playlist of music. This Audio manager was adapted from the tutorial on Brackeys youtube channel. He has a great set of tutorial covering many aspects of Unity game development. Check out his web page brackeys.com too.
Full Unity 2D Game Tutorial 2019 – Where to get Sound effects and Music from?
If like me you haven’t been blessed with the skills to make cool music and audio effects you can still find a lot of effects and music free that you can use within your game. The first of those is freesound.org. The freesound website has a huge range of sound which you can use in your game. Just make sure to check the licence for the sound effect your using as many of them just require you to give appropriate credit and a link to the license.
The Second site is freemusicarchive.org, again this site has a huge range of Music and many of them are available to use in your game. Remember to check the license for each song you use and to give credit even if it isn’t required. People have worked hard to produce something and they deserve to be recognised for it.
For this section of the tutorial we will be adding 3 songs to a playlist and 1 sound effect for the bullets. Use these sites to find yourself some music and effects. In our game the bullets fire fast and there is a lot of them so try to find something that won’t make the player want to mute the game as soon as they fire.
Full Unity 2D Game Tutorial 2019 – Audio Manager Sound Code
The first thing we will do is create a class that will store all the details about our music/effect. It will hold things like the volume, the actual music clip, the source etc.
|
1 2 3 4 5 6 7 8 9 10 11 12 13 14 15 |
using System; using UnityEngine; [System.Serializable] public class Sound { public string name; //Store the name of our music/effect public AudioClip clip; //Store the actual music/effect [Range(0f, 1f)] //limit the range in the Unity editor public float volume; //Store our volume [Range(0.1f, 3f)] //Limit the Range again public float pitch; // set the picth for our music/effect [HideInInspector] //Hide this variable from the Editor public AudioSource source;// the source that will play the sound public bool loop = false;// should this sound loop } |
Code Notes:
Since we are not using the monobehaviour and we want to see the variables in the Unity editor we add [System.Serializable]
Full Unity 2D Game Tutorial 2019 – Audio Manager Code
|
1 2 3 4 5 6 7 8 9 10 11 12 13 14 15 16 17 18 19 20 21 22 23 24 25 26 27 28 29 30 31 32 33 34 35 36 37 38 39 40 41 42 43 44 45 46 47 48 49 50 51 52 53 54 55 56 57 58 59 60 61 62 63 64 65 66 67 68 69 70 71 72 73 74 75 76 77 78 79 80 81 82 83 84 85 86 87 88 89 90 91 92 93 94 95 96 97 98 99 100 101 102 103 104 105 106 107 108 109 110 111 112 113 114 115 116 117 |
using UnityEngine; using System; using UnityEngine.Audio; public class AudioManager : MonoBehaviour { public Sound[] sounds; // store all our sounds public Sound[] playlist; // store all our music private int currentPlayingIndex = 999; // set high to signify no song playing // a play music flag so we can stop playing music during cutscenes etc private bool shouldPlayMusic = false; public static AudioManager instance; // will hold a reference to the first AudioManager created private float mvol; // Global music volume private float evol; // Global effects volume private void Start() { //start the music PlayMusic(); } private void Awake() { if (instance == null) { // if the instance var is null this is first AudioManager instance = this; //save this AudioManager in instance } else { Destroy(gameObject); // this isnt the first so destroy it return; // since this isn't the first return so no other code is run } DontDestroyOnLoad(gameObject); // do not destroy me when a new scene loads // get preferences mvol = PlayerPrefs.GetFloat("MusicVolume", 0.75f); evol = PlayerPrefs.GetFloat("EffectsVolume", 0.75f); createAudioSources(sounds, evol); // create sources for effects createAudioSources(playlist, mvol); // create sources for music } // create sources private void createAudioSources(Sound[] sounds, float volume) { foreach (Sound s in sounds) { // loop through each music/effect s.source = gameObject.AddComponent<AudioSource>(); // create anew audio source(where the sound splays from in the world) s.source.clip = s.clip; // the actual music/effect clip s.source.volume = s.volume * volume; // set volume based on parameter s.source.pitch = s.pitch; // set the pitch s.source.loop = s.loop; // should it loop } } public void PlaySound(string name) { // here we get the Sound from our array with the name passed in the methods parameters Sound s = Array.Find(sounds, sound => sound.name == name); if (s == null) { Debug.LogError("Unable to play sound " + name); return; } s.source.Play(); // play the sound } public void PlayMusic() { if (shouldPlayMusic == false) { shouldPlayMusic = true; // pick a random song from our playlist currentPlayingIndex = UnityEngine.Random.Range(0, playlist.Length - 1); playlist[currentPlayingIndex].source.volume = playlist[0].volume * mvol; // set the volume playlist[currentPlayingIndex].source.Play(); // play it } } // stop music public void StopMusic() { if (shouldPlayMusic == true) { shouldPlayMusic = false; currentPlayingIndex = 999; // reset playlist counter } } void Update() { // if we are playing a track from the playlist && it has stopped playing if (currentPlayingIndex != 999 && !playlist[currentPlayingIndex].source.isPlaying) { currentPlayingIndex++; // set next index if (currentPlayingIndex >= playlist.Length) { //have we went too high currentPlayingIndex = 0; // reset list when max reached } playlist[currentPlayingIndex].source.Play(); // play that funky music } } // get the song name public String getSongName() { return playlist[currentPlayingIndex].name; } // if the music volume change update all the audio sources public void musicVolumeChanged() { foreach (Sound m in playlist) { mvol = PlayerPrefs.GetFloat("MusicVolume", 0.75f); m.source.volume = playlist[0].volume * mvol; } } //if the effects volume changed update the audio sources public void effectVolumeChanged() { evol = PlayerPrefs.GetFloat("EffectsVolume", 0.75f); foreach (Sound s in sounds) { s.source.volume = s.volume * evol; } sounds[0].source.Play(); // play an effect so user can her effect volume } } |
Full Unity 2D Game Tutorial 2019 – Audio Manager Code Details
Lets start with the tough bit. The audio manager instance. This is a variable that will store only the first AudioManager we create, and any other AudioManagers that get created will be destroyed. This coupled with the DontDestroyOnLoad(gameObject); means the AudioMager will persist through all of our scenes making it available to all our scenes. This is what is known as a Singleton(not a true singleton but close enough for us). For more information on this pattern check it out on wikipedia.
Now we have that out of the way. In our Audio Manager we have the sounds and playlist Arrays to store all our music and sounds. We have an index which is used to see which of our playlist songs is playing and it doubles as a flag to check if the playlist is playing. We also have a method for creating audio sources. Music and effects need an audio source. It’s the place in the game world where the sound is played from.
We have also created PlaySound and PlayMusic so we can trigger the playing of sounds and music. There is a StopMusic but no StopEffect because we will let the effects control when they should stop.
The getSongName method will be used by our UI to display what music is currently playing and the MusicVolumeChnaged and effectsVolumeChanged will be used to update our audio sources volume when we implement the UI and preferences.
Another thing you may have noticed is the PlayerPrefs.Getxxx methods. Even though we haven’t implemented any preferences they have a default value attached so they will always get a value even if we haven’t added a way for the user to change them yet.
Full Unity 2D Game Tutorial 2019 – Adding Audio Files
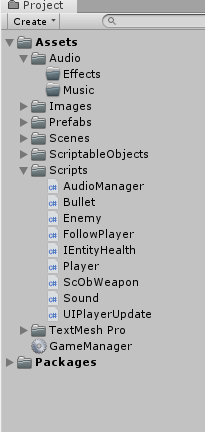
We have our Sound and AudioManager scripts so move them into the scripts folder for cleanliness. Create an Audio folder and inside that create an Effects Folder and a Musics Folder. Add your effects and music by dropping them in their respective folders. You shouldn’t have any settings to change for the audio however not every audio format is supported so be aware.
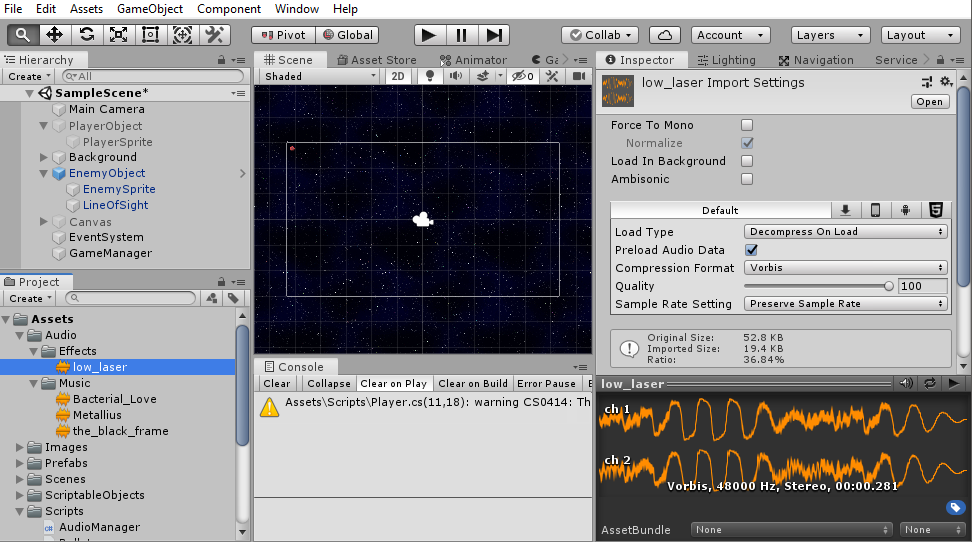 Our AudioManager exists but not in our Unity world. To add it to our world we will create an empty game object and attach the script to it.
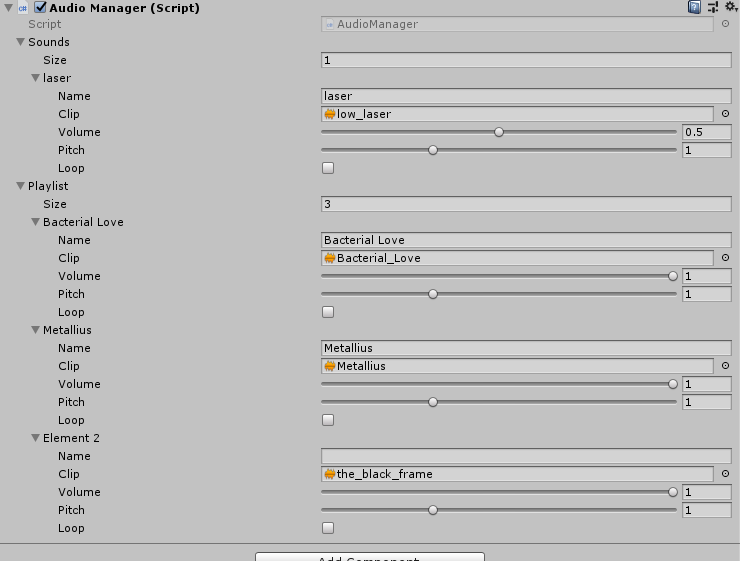
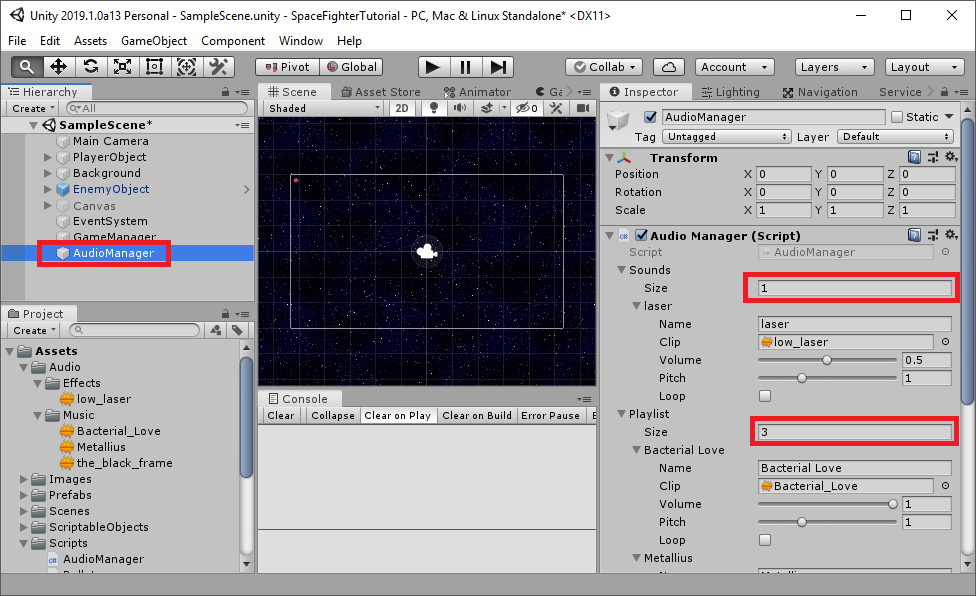 We can then set the size of our Sound and Music arrays. 1 for the effects since we only have 1 effect at the moment and 3 for our music. The settings will be blank when you first create the arrays. We just need to populate them with the audio by dragging the audio from our project folder into the clip field and then setting the other values by hand.
If you play the game now you will hear music and it will loop through the playlist of songs you added. Yay! now we work on playing the sounds for the bullet.
Full Unity 2D Game Tutorial 2019 – Sound Effects
I will show you 2 ways of playing a sound effect for your bullet. The first which is the easiest and uses our audio manager is to update the Start method in our Bullet script to this:
|
1 2 3 4 5 6 7 |
void Start() { // find our RigidBody Rigidbody2D rb = gameObject.GetComponentInChildren<Rigidbody2D>(); // add force rb.AddForce(targetVector.normalized * speed); AudioManager.instance.PlaySound("laser"); // use the name you eneterd for your sound effect here } |
Now, we can see how the use of the Singleton pattern allows us to call the AudioManager from a script without having to link it inside Unity by using AudioManager.instance.
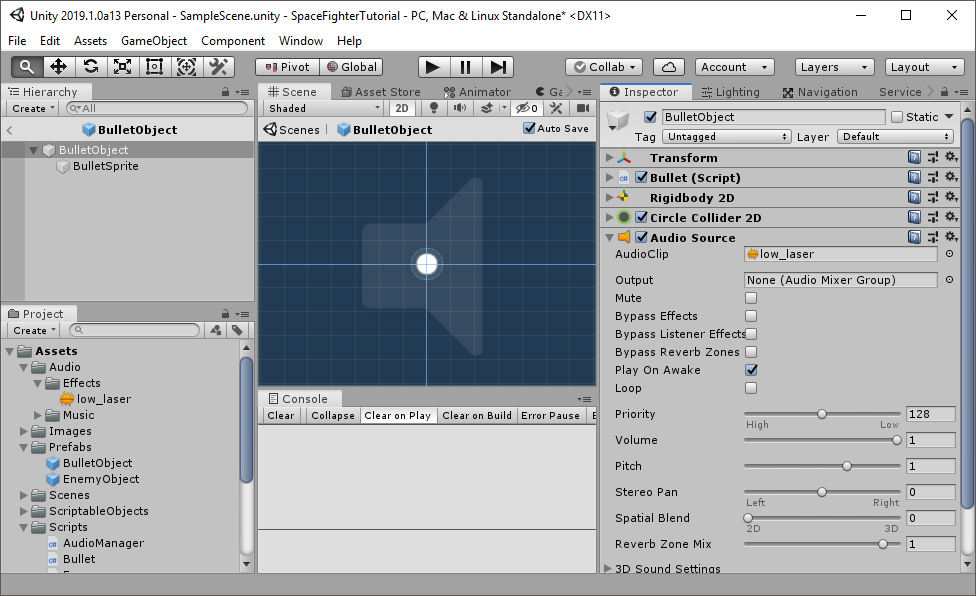
The second way to make the bullet play a sound is to bypass the AudioManager all together and add an audio source to out bullet prefab that plays on awake. So open your bullet prefab and add an AudioSource. Then set the audio clip to the sound effect you want to play. Make sure Play On Awake is checked and all your bullets will automatically play a sound when they are created.
I advise against using this method because you will have to create some way of setting the volume for the clip based on our preferences later. You also created an AudioManager to handle this sort of thing already. It was added here so you could see how to implement sound without the Audio Manager.
That’s it for this part of the tutorial. The source, as always, is available here on Github.

[…] Previous Part – Next Part […]
Hi, there’s a lot of great stuff in your tutorials. How would you go about adding multiple sounds to the same game object? I have an object which makes various chimes, but with the above I can’t figure how to play more than one sound. Currently I’m using an array of sounds on each object and playing a random clip but I would like to be able to use your system for better use.