

What is the Texture packer?
The Texture packer is a class provided by LibGDX which can be used to pack a group of images into a single larger file, or multiple larger files depending on how many images you have. There is a GUI version which is provided by www.aurelienribon.com and will be used in this tutorial. The Texture packer can be used from the command line or from in your project but I recommend using the GUI version and packing your images externally and adding the final packs to your project manually. This means you can get your artist to draw each image separately and add them as they are created.
Why use the texture packer?
The main reason to use a texture packer is that loading individual images is expensive. Loading 200 small images would take a lot of processing time whereas loading 1 image and using portions of that image would use a considerably smaller amount. Another reason to use the texture packer is that it keeps all your images in one accessible place. Once you load the image atlas you have all your images loaded and ready for use.
Texture Packer Settings
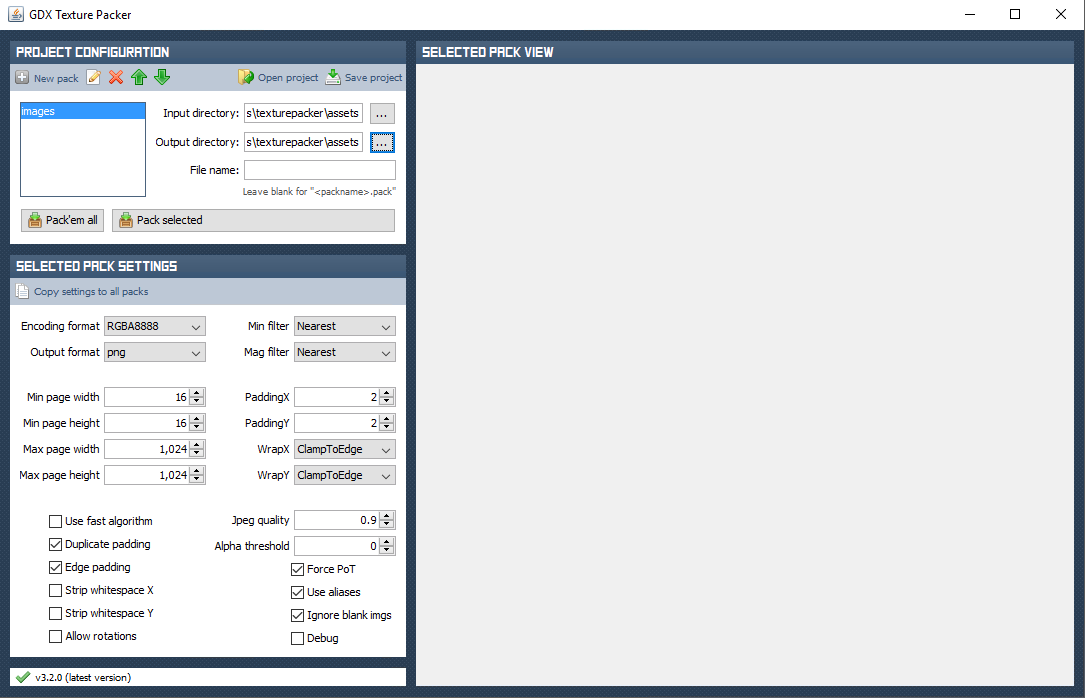
Below are the settings I use when packing my images. These setting have duplicate padding and edge padding which helps reduce texture artifacting with tiled maps.
Settings and explanations as why I have used them.
- Encoding RGBA8888
- I use RGBA to keep alpha channels and 8888 to store higher quality images
- Output Format PNG
- PNG is a good format to use
- Min/Mag filter
- Both nearest. This means the nearest pixel will be used when using images at non native scales.
- Min page height/Width
- 16px as I rarely use images less than 16px
- Max page height/Width
- Some Old Devices are unable to handle images over 1024px so 1024 is my max image size.
- Padding x/y
- 2 pixels is enough padding
- WrapX/WrapY
- Honestly I don’t know what these do xD
- Use Fast Algorythm
- No, I tend not to use fast anything as it generally results in lower quality and my pc is decent enough to do it pretty quickly enough any ways.
- Duplicate Padding + Edge Padding
- Yes, yes yes. Without these you will have a pretty bad time rendering anything tiled when scaled.
- Strip WhiteSpace x/y
- I don’t use this as I may place objects in my images at the right location and strip whitespace would mean the object placement is always in the center.
- Allow Rotations
- This can be on or off but I like it off so my images are always upright
- Force POT
- This forces the images to be a Power Of Two which is required for older version of Open GL
- Aliases
- Yes, This means if one image is exactly the same as another they will both reference the same image.
- Ignore Blank images
- No, If I add a blank image then I would have added it for a reason so no reason to remove it.
Hopefully these settings help you out in your project.
Now you know how to pack your image, why don’t you learn how to manage them in your project with Asset Manager?
Further reading