
Full LibGDX Game Tutorial – Particle Effects
Welcome to part 16 of our Full LibGDX Game Tutorial. This part will focus on adding a particle effects system in our Ashley ECS. If you haven’t seen the earlier parts of this tutorial I advise you to start at Full LibGDX Game Tutorial – Project setup as this tutorial continues from these earlier parts. For those of you who have come from part 15, you can continue on.
In this part, we will update our Asset Manager to load our Particle Effects, add a system and components for our particle effects, create a particle effect manager that will manage the creating of pools for our particle effects and finally, create some methods to spawn particle effects on certain events. If you want to create your own particle effects or learn how to use the editor, you can look at this Particle Effects Editor Tutorial.
The Particle Effect Component
The first item we will make is the ParticleEffectComponent which will store the particle effect, the attached state and if attached, the box2d body it is attached to. This is a pooled entity so will need the poolable interface and a reset method. In the reset method, we will also need to free the pooled particle effect. This pooled object inside a pooled object shouldn’t create any issues as long as it is understood that both objects need to be released once finished.
|
1 2 3 4 5 6 7 8 9 10 11 12 13 14 15 16 17 18 19 20 21 22 23 24 25 26 27 28 |
package blog.gamedevelopment.box2dtutorial.entity.components; import com.badlogic.ashley.core.Component; import com.badlogic.gdx.graphics.g2d.ParticleEffectPool.PooledEffect; import com.badlogic.gdx.physics.box2d.Body; import com.badlogic.gdx.utils.Pool.Poolable; public class ParticleEffectComponent implements Component,Poolable{ public PooledEffect particleEffect; public boolean isattached = false; public float xOffset = 0; public float yOffset = 0; public float timeTilDeath = 0.5f; // add a 1 second delay public boolean isDead = false; public Body attachedBody; @Override public void reset() { particleEffect.free(); // free the pooled effect particleEffect = null; // empty this component's particle effect xOffset = 0; yOffset = 0; isattached = false; isDead = false; attachedBody = null; timeTilDeath = 0.5f; } } |
Particle Effect System
Next, we need a new system that will render the particle effects. We already have a system that renders entities with Texture and Transform components. All we need to do is make a copy of this and adjust it so it can render particles instead. To save on recreating the spritebatch and camera we will use the ones we already have since they are already set up to the right scale for our game. We will now make a new system called ParticleEffectSystem which takes the spritebatch and camera as parameters.
|
1 2 3 4 5 6 7 8 9 10 11 12 13 14 15 16 17 18 19 20 21 22 23 24 25 26 27 28 29 30 31 32 33 34 35 36 37 38 39 40 41 42 43 44 45 46 47 48 49 50 51 52 53 54 55 56 57 58 59 60 61 62 63 64 65 66 |
package blog.gamedevelopment.box2dtutorial.entity.systems; import blog.gamedevelopment.box2dtutorial.entity.components.Mapper; import blog.gamedevelopment.box2dtutorial.entity.components.ParticleEffectComponent; import com.badlogic.ashley.core.Entity; import com.badlogic.ashley.core.Family; import com.badlogic.ashley.systems.IteratingSystem; import com.badlogic.gdx.graphics.OrthographicCamera; import com.badlogic.gdx.graphics.g2d.SpriteBatch; import com.badlogic.gdx.utils.Array; public class ParticleEffectSystem extends IteratingSystem{ private static final boolean shouldRender = true; private Array<Entity> renderQueue; private SpriteBatch batch; private OrthographicCamera camera; @SuppressWarnings("unchecked") public ParticleEffectSystem(SpriteBatch sb, OrthographicCamera cam) { super(Family.all(ParticleEffectComponent.class).get()); renderQueue = new Array<Entity>(); batch = sb; camera = cam; } @Override public void update(float deltaTime) { super.update(deltaTime); batch.setProjectionMatrix(camera.combined); batch.enableBlending(); // Render PE if(shouldRender){ batch.begin(); for (Entity entity : renderQueue) { ParticleEffectComponent pec = Mapper.peCom.get(entity); pec.particleEffect.draw(batch, deltaTime); } batch.end(); } renderQueue.clear(); } @Override protected void processEntity(Entity entity, float deltaTime) { ParticleEffectComponent pec = Mapper.peCom.get(entity); if(pec.isDead){ pec.timeTilDeath -= deltaTime; } // Move PE if attached if(pec.isattached){ pec.particleEffect.setPosition( pec.attachedBody.getPosition().x + pec.xOffset, pec.attachedBody.getPosition().y + pec.yOffset); } // free PE if completed if(pec.particleEffect.isComplete() || pec.timeTilDeath <= 0){ getEngine().removeEntity(entity); }else{ renderQueue.add(entity); } } } |
Here we have our system which has a processEntity method that is run once per entity. This will update the ParticleEffect position if attached to a body and remove any finished particle effects before adding them to the renderQueue. The update method is called once per frame and will render all particle effects. Here we use the timeTilDeath property to allow us to have effects that last longer than the object it is attached to. We also use the xOffset and yOffset to allow us to attach particle effects to bodies with an offset so all particle effects aren’t drawn in the centre of the body.
The Mapper class has an extra object for the ParticleEffectsComponent and is simply added to the mapper class with the following:
|
1 |
public static final ComponentMapper<ParticleEffectComponent> peCom = ComponentMapper.getFor(ParticleEffectComponent.class); |
Particle Effect Loading
If you can remember way back to part 8, we added the loading screen and we planned ahead and added a section for loading particle effects. This means the queueAddParticleEffects() method is already being called in our loading screen and all we have to do is populate it with the files we require to load. So update the AssetManager with the particle effect paths and the particle effect load code below:
|
1 2 3 4 5 6 7 8 9 10 11 12 13 |
// Particle Effects public final String smokeEffect = "particles/smoke.pe"; public final String waterEffect = "particles/water.pe"; public final String fireEffect = "particles/fire.pe"; public void queueAddParticleEffects(){ ParticleEffectParameter pep = new ParticleEffectParameter(); pep.atlasFile = "images/game.atlas"; manager.load(smokeEffect, ParticleEffect.class, pep); manager.load(waterEffect, ParticleEffect.class, pep); manager.load(fireEffect, ParticleEffect.class, pep); } |
You can download the particle effects from here
Particle Effect Manager
We can load and render our particle effects now but we still need some sort of system to control the creation of particle effect pools and an ability to get particle effects. To do this we will make a ParticleEffectManager which will store all the pools which the particle effects are pulled from.
|
1 2 3 4 5 6 7 8 9 10 11 12 13 14 15 16 17 18 19 20 21 22 23 24 25 26 27 28 29 30 31 32 33 34 35 36 37 38 39 40 41 42 43 44 45 46 47 48 49 50 51 52 53 54 55 56 57 58 59 60 61 62 63 64 65 66 67 68 69 70 |
package blog.gamedevelopment.box2dtutorial; import com.badlogic.gdx.graphics.g2d.ParticleEffect; import com.badlogic.gdx.graphics.g2d.ParticleEffectPool; import com.badlogic.gdx.graphics.g2d.ParticleEffectPool.PooledEffect; import com.badlogic.gdx.utils.IntMap; /** * A pooled particle effect manager to store particle effect pools * */ public class ParticleEffectManager { // DEFINE constants for particleEffects public static final int SMOKE = 0; public static final int WATER = 1; public static final int FIRE = 2; // create intmaps for effects and pools private IntMap<ParticleEffect> partyEffects; private IntMap<ParticleEffectPool> partyEffectPool; /** * Particle Effect Manager for controlling creating pools and dispensing particle effects */ public ParticleEffectManager(){ partyEffects = new IntMap<ParticleEffect>(); partyEffectPool = new IntMap<ParticleEffectPool>(); } /** Create a particle effect pool for type with default values (scale 1, pool init capacity 5, max capacity 20) * @param type int id of particle effect * @param party the particle effect */ public void addParticleEffect(int type, ParticleEffect party){ addParticleEffect(type,party,1); } /** Create a particle effect pool for type with scale and default pool sizes * @param type int id of particle effect * @param party the particle effect * @param scale The particle effect scale */ public void addParticleEffect(int type, ParticleEffect party, float scale ){ addParticleEffect(type,party,scale,5,20); } /** Create a particle effect pool for type * @param type int id of particle effect * @param party the particle effect * @param scale The particle effect scale * @param startCapacity pool initial capacity * @param maxCapacity pool max capacity */ public void addParticleEffect(int type, ParticleEffect party, float scale, int startCapacity, int maxCapacity){ party.scaleEffect(scale); partyEffects.put(type, party); partyEffectPool.put(type,new ParticleEffectPool(party,startCapacity,maxCapacity)); } /** * Get a particle effect of type type * @param type the type to get * @return The pooled particle effect */ public PooledEffect getPooledParticleEffect(int type){ return partyEffectPool.get(type).obtain(); } } |
This manager is basically a store for all the pools needed for the particle effects where we use the addParticleEffect to initialise a new pool for that particle. Then user the getPooledParticleEffect to get a particle effect from the pool.
Implementing the Particle Effect Manager
The ParticleEffectManager needs to be added to our code. We will be adding it to our LevelFactory in the constructor so that it creates all the pools needed when the levelFactory is created.
|
1 2 3 4 |
pem = new ParticleEffectManager(); pem.addParticleEffect(ParticleEffectManager.FIRE, assMan.manager.get("particles/fire.pe",ParticleEffect.class),1f/64f); pem.addParticleEffect(ParticleEffectManager.WATER, assMan.manager.get("particles/water.pe",ParticleEffect.class),1f/64f); pem.addParticleEffect(ParticleEffectManager.SMOKE, assMan.manager.get("particles/smoke.pe",ParticleEffect.class),1f/64f); |
Now, we need to add 2 new methods for creating the particle effects. One for particle effects that stay on one position and one that is attached to a box2dbody.
|
1 2 3 4 5 6 7 8 9 10 11 12 13 14 15 16 17 18 19 20 21 22 23 24 25 26 27 28 29 30 31 32 33 34 35 36 37 38 39 40 41 42 43 44 45 46 47 |
/** * Make particle effect at xy * @param x * @param y * @return the Particle Effect Entity */ public Entity makeParticleEffect(int type, float x, float y){ Entity entPE = engine.createEntity(); ParticleEffectComponent pec = engine.createComponent(ParticleEffectComponent.class); pec.particleEffect = pem.getPooledParticleEffect(type); pec.particleEffect.setPosition(x, y); entPE.add(pec); engine.addEntity(entPE); return entPE; } /** Attache particle effect to body from body component * @param type the type of particle effect to show * @param b2dbody the bodycomponent with the body to attach to * @return the Particle Effect Entity */ public Entity makeParticleEffect(int type, B2dBodyComponent b2dbody){ return makeParticleEffect(type,b2dbody,0,0); } /** * Attache particle effect to body from body component with offsets * @param type the type of particle effect to show * @param b2dbody the bodycomponent with the body to attach to * @param xo x offset * @param yo y offset * @return the Particle Effect Entity */ public Entity makeParticleEffect(int type, B2dBodyComponent b2dbody, float xo, float yo){ Entity entPE = engine.createEntity(); ParticleEffectComponent pec = engine.createComponent(ParticleEffectComponent.class); pec.particleEffect = pem.getPooledParticleEffect(type); pec.particleEffect.setPosition(b2dbody.body.getPosition().x, b2dbody.body.getPosition().y); pec.particleEffect.getEmitters().first().setAttached(true); //manually attach for testing pec.xOffset = xo; pec.yOffset = yo; pec.isattached = true; pec.attachedBody = b2dbody.body; entPE.add(pec); engine.addEntity(entPE); return entPE; } |
In order to attach the FIRE particle effect to the bullets we simply add this code in our createBullet method near the end.
|
1 |
makeParticleEffect(ParticleEffectManager.FIRE,b2dbody); |
Now every time a bullet is created our FIRE particle effect will be added to our bullet and attached to the body. We also want a reference to our particle effect in our bullet component so we can tell the particle effect to die once our bullet is dead. To add a reference to our effect we will update our bullet component to:
|
1 2 3 4 5 6 7 8 9 10 11 12 13 14 |
public class BulletComponent implements Component, Poolable{ public Entity particleEffect; public float xVel = 0; public float yVel = 0; public boolean isDead = false; @Override public void reset() { xVel = 0; yVel = 0; isDead = false; particleEffect = null; } } |
Now our bullet has a space for a reference to its particle effect we need to add the particle effect to it when the bullet is made. This is simply updating our levelFactory.createBullet method to add the effect to our bulletComponent
|
1 2 |
//attach party to bullet bul.particleEffect = makeParticleEffect(ParticleEffectManager.FIRE,b2dbody); |
Now when a bullet dies in our bulletSystem we can set the particle to dead too with
|
1 2 3 4 5 6 |
//check if bullet is dead if(bullet.isDead){ System.out.println("Bullet died"); Mapper.peCom.get(bullet.particleEffect).isDead = true; b2body.isDead = true; } |
We now have everything in our code to make, draw and release particle effects. All we need to do now is make sure our engine knows about the new systems.
Adding the ParticleEffectSystem to our Engine
In our MainScreen we need to update the constructor so it makes our new ParticleEffectSystem and adds it to the engine. We add it after our renderSystem so that particle effects are drawn on top of our normal texture renders.
|
1 2 3 4 5 6 7 8 9 10 11 12 13 14 15 16 17 18 19 20 21 22 23 24 25 26 27 |
//....more code engine = new PooledEngine(); // next guide - changed this to atlas lvlFactory = new LevelFactory(engine,parent.assMan); sb = new SpriteBatch(); RenderingSystem renderingSystem = new RenderingSystem(sb); cam = renderingSystem.getCamera(); ParticleEffectSystem particleSystem = new ParticleEffectSystem(sb,cam); sb.setProjectionMatrix(cam.combined); engine.addSystem(new AnimationSystem()); engine.addSystem(new PhysicsSystem(lvlFactory.world)); engine.addSystem(renderingSystem); // not a fan of splitting batch into rendering and particles but I like the separation of the systems engine.addSystem(particleSystem); // particle get drawns on top so should be placed after normal rendering engine.addSystem(new PhysicsDebugSystem(lvlFactory.world, renderingSystem.getCamera())); engine.addSystem(new CollisionSystem()); engine.addSystem(new PlayerControlSystem(controller,lvlFactory)); engine.addSystem(new EnemySystem()); player = lvlFactory.createPlayer(cam); engine.addSystem(new WallSystem(player)); engine.addSystem(new WaterFloorSystem(player)); engine.addSystem(new BulletSystem(player)); engine.addSystem(new LevelGenerationSystem(lvlFactory)); // ...... more code |
That was quite a lot of work for a single particle effect however, now we have this system in place adding further particle effects is simple.
Adding more effects
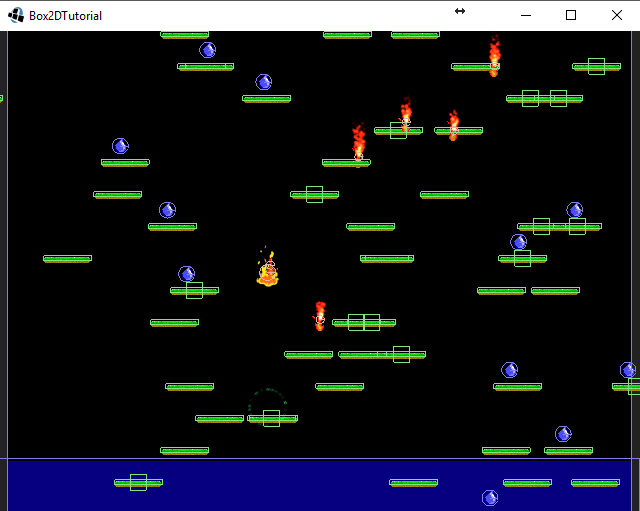
With the system in place we can add some more effects to other areas of the game. We already have 3 effects loaded. Fire for the bullets, smoke will be for our teleporter and water will be for the water at the bottom. Our teleport/spring mechanic could use a nice effect so let’s add the smoke one now.
|
1 2 3 4 5 6 7 8 9 10 |
// make player teleport higher if(player.onSpring){ //b2body.body.applyLinearImpulse(0, 175f, b2body.body.getWorldCenter().x,b2body.body.getWorldCenter().y, true); //add particle effect at feet lvlFactory.makeParticleEffect(ParticleEffectManager.SMOKE, b2body.body.getPosition().x, b2body.body.getPosition().y); // move player b2body.body.setTransform(b2body.body.getPosition().x, b2body.body.getPosition().y+ 10, b2body.body.getAngle()); //state.set(StateComponent.STATE_JUMPING); player.onSpring = false; } |
The teleporter doesn’t move so doesn’t need to have an effect attached, all we needed to do was to set the place for the effect to be drawn. That’s all that needs to be done to add an extra particle effect.
Next, we add the water effect. The water effect is a continuous effect and will never end. Its job is to look like the shimmering of light on the surface ripples. Granted it’s not the best effect and could do with some improving but we’re going to add it anyway so we can at least have something in place for the water. To add it we simply add this code to our createWaterFloor method in our levelFactory:
|
1 |
makeParticleEffect(ParticleEffectManager.WATER, b2dbody,-15,22); |
Here we attach the effect to the waterFloor body which is quite big and ends up in the centre of the waterFloor body. So we add the offset values -15 and 22 to increase the height of the effect and move it left a bit so it appears on the top on the water object.
As usual, the full project download is available from stormyvids. In the next part, Ashley & teering Behaviours Part 17 we will add the gdx-ai extension and use the steering behaviours to a new enemy.
| ← General Improvements | — Contents — | Ashley & Steering Behaviors → |
donde esta el enlace para descargar el proyecto porfa
nice article.